In US, we do not get salt packed in packets, the way we do at supermarkets in India. If in India we pick up those plastic sachets with brand names such as Tata and Annapurna glistening bright on them, the containers here are more welcoming. Made with cardboard I mean.
Still, trashing the boxes is a pain. So this time, I decided to re-use. And touched it up. A bit.

Needless to say, am happy about it. My brushes found a home. Maybe my pens and pencils will too. If you want to try this DIY, here is how I went about it.
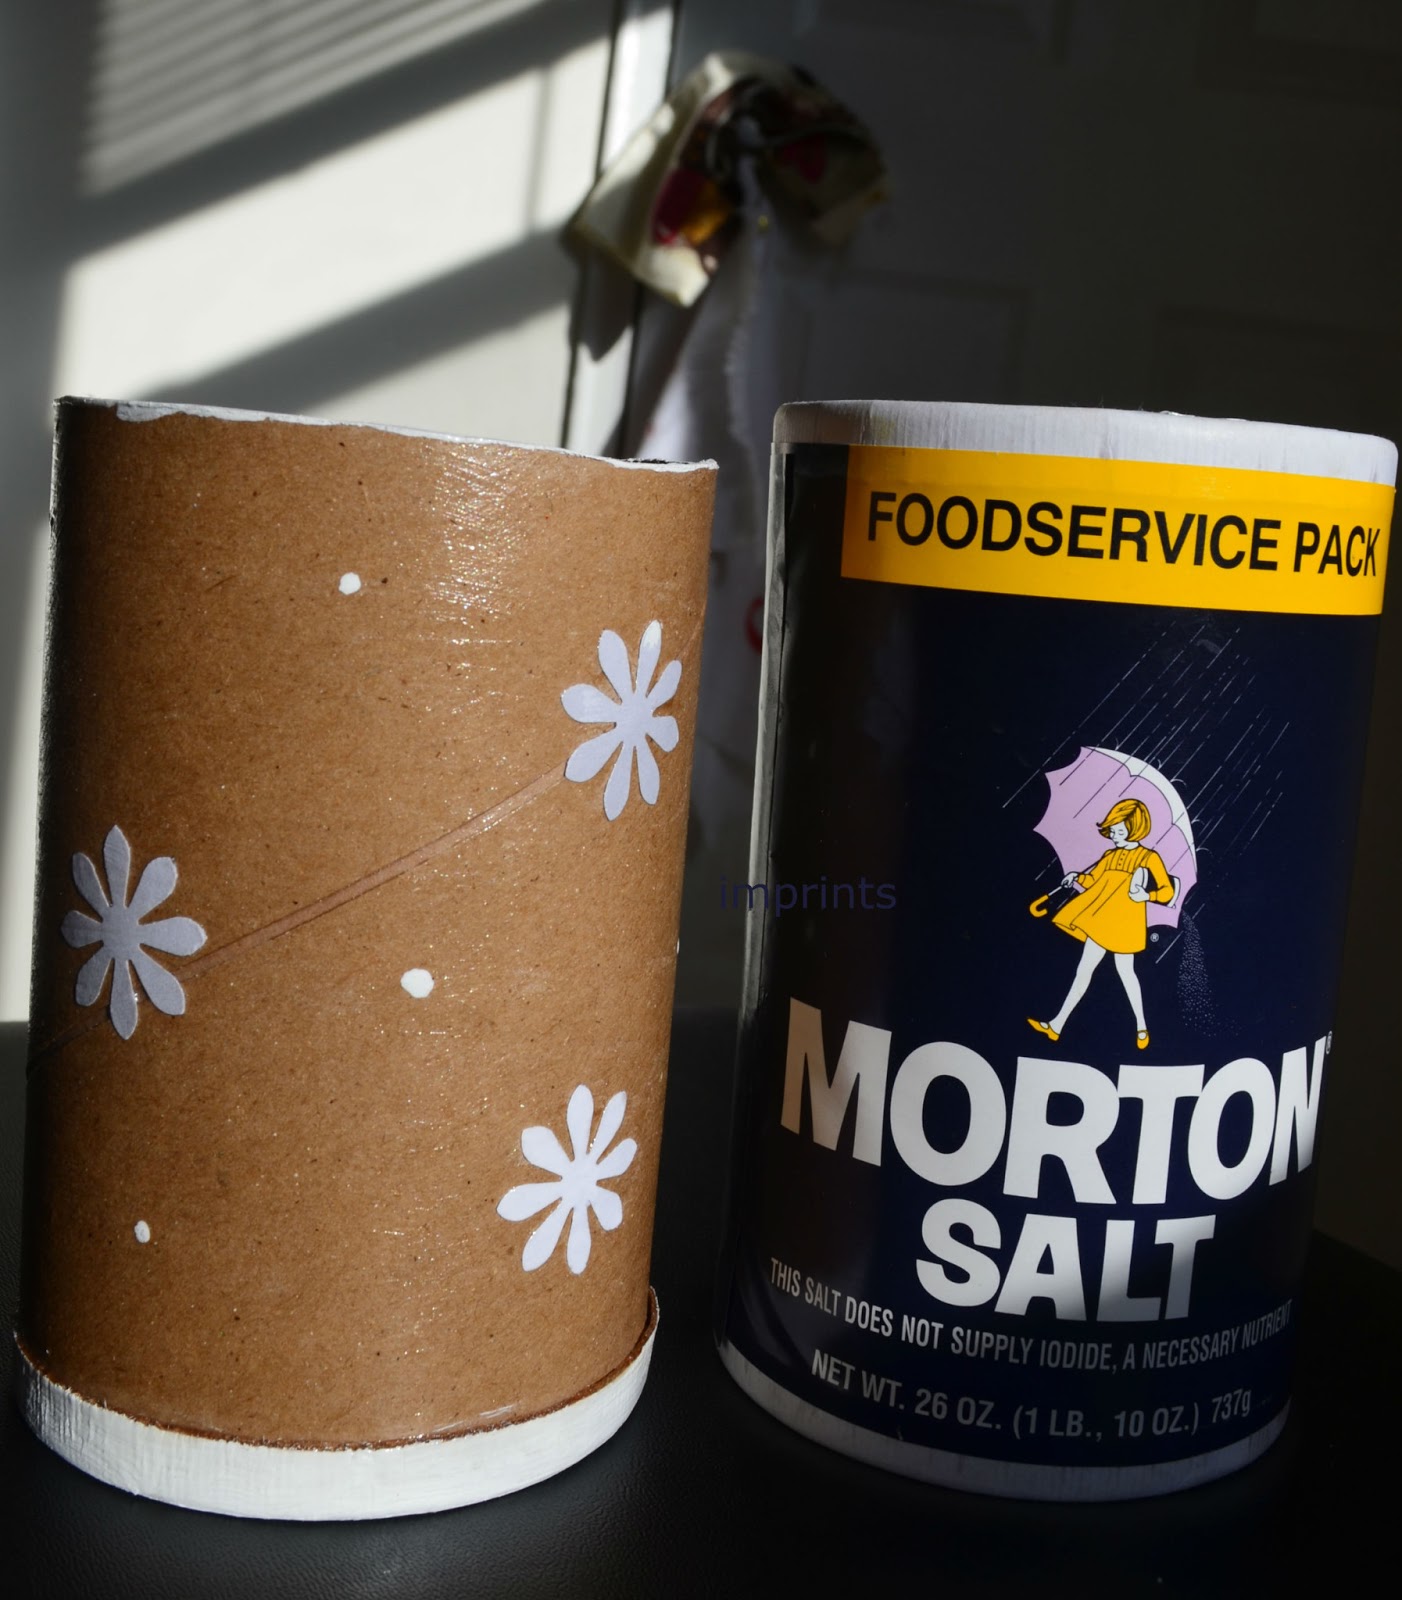
Here are the pictures - Before and After look:)

I used a craft knife to remove the top base that holds the lid. It came out somewhat uneven, as this one needs superb skill. I did not mind though, as long as it served a purpose.

I turned to the stash of pre-punched flowers I had ready, from mail trash - postal envelopes that is.


I am so so in love with this flower punch! My other new love is Mod Podge. It comes in so handy to seal fragile work and decoupage!
I simply stuck these flowers randomly to the outer side of the box. Yeah, before this I did make sure there were no salt remnants inside though. If any when you do, wipe it clean.
After sticking the flowers...I used the glue brush to paint a layer of Mod Podge on to the surface. But not before I used a bit of white paint, to touch the surface up, and also the base, which had paled from use over the month.


And this is how it finally looks.

To take it further, I tried it on another box - curd plastic carton from the Desi curd that sells in Indian groceries in New Jersey.

The trouble with this box is those folds you see on its left side. That's because I did not knead the air bubbles out when I stuck a gift wrap. This gift wrapping paper, in bright red, was one of those cheaper ones we picked up during Christmas sales. I used the left-over paper on this. Since the top edge would get messy with paper, I used red craft paint (acrylic), to blend the colours in. In the botton, I cut it into ridges and stuck it one over the other. After that, it was about painting...and two layers of Mod Podge over it all.
If you do not have Mod Podge, you can make it with Fevicol and other Craft glue by adding water.
Here is a link to one such tutorial from Woodooz
I just made a beginning with decoupage. All the best for your new beginnings!
Pictures Courtesy: M Radhika
For permissions to use, please mail: radicreative@gmail.com
Still, trashing the boxes is a pain. So this time, I decided to re-use. And touched it up. A bit.

Needless to say, am happy about it. My brushes found a home. Maybe my pens and pencils will too. If you want to try this DIY, here is how I went about it.
Here are the pictures - Before and After look:)
I used a craft knife to remove the top base that holds the lid. It came out somewhat uneven, as this one needs superb skill. I did not mind though, as long as it served a purpose.

I turned to the stash of pre-punched flowers I had ready, from mail trash - postal envelopes that is.


I am so so in love with this flower punch! My other new love is Mod Podge. It comes in so handy to seal fragile work and decoupage!
I simply stuck these flowers randomly to the outer side of the box. Yeah, before this I did make sure there were no salt remnants inside though. If any when you do, wipe it clean.
After sticking the flowers...I used the glue brush to paint a layer of Mod Podge on to the surface. But not before I used a bit of white paint, to touch the surface up, and also the base, which had paled from use over the month.


And this is how it finally looks.

To take it further, I tried it on another box - curd plastic carton from the Desi curd that sells in Indian groceries in New Jersey.

The trouble with this box is those folds you see on its left side. That's because I did not knead the air bubbles out when I stuck a gift wrap. This gift wrapping paper, in bright red, was one of those cheaper ones we picked up during Christmas sales. I used the left-over paper on this. Since the top edge would get messy with paper, I used red craft paint (acrylic), to blend the colours in. In the botton, I cut it into ridges and stuck it one over the other. After that, it was about painting...and two layers of Mod Podge over it all.
If you do not have Mod Podge, you can make it with Fevicol and other Craft glue by adding water.
Here is a link to one such tutorial from Woodooz
I just made a beginning with decoupage. All the best for your new beginnings!
Pictures Courtesy: M Radhika
For permissions to use, please mail: radicreative@gmail.com
No comments:
Post a Comment