Showing posts with label Painting. Show all posts

Tuesday, April 4

Marker pens art piece fridge magnet DIY


If you have a fridge that can hold a ton of magnets, it is the best thing to rev up your dull day. Imagine thinking of that stew you want to prepare in the kitchen and drag yourself to the fridge, and a bright piece of art or travel souvenir magnet pops up on your face at the fridge door!

I discovered on the internet that you can actually make artistic fridge magnets rather easily. All you need is a bunch of marker pens that write or colour thick.

Here is a quick look at my experiment. I would give it a 6 on 10 rating for my first attempt. But I learnt a few things that would help you on the adventure:)


You will need:

- art canvas 5 inches by 5 inches

-- self adhesive magnet strips not more than five inches

-- a protective sheet to place underneath your working canvas

-- some cotton balls, or ear buds, paint brushes, rag cloth

-- a bunch of marker pens, of your choice. I used the Sharpie brand mostly

-- Rubbing alcohol..you get it in pharmacies

Optional is a glue gun or multi-surface glue


Start by scribbling the canvas away to your heart's content. Remember to fill all corners, and the edges where the canvas bends. Use more strokes if your marker is not too thick. I was more satisfied with my opaque colour marker.


Now is when your work with rubbing alcohol begins. Use an ink-filler or the cap of the alcohol bottle to drop a few drops on the canvas. Remember that you may take longer than you anticipate at this. Allow the drops to spread on the colours. Since it is canvas, it will dry or get absorbed more than it runs. Use a paint brush to blend the colours in.


You could tilt it at times to let the drops run. Or use a paint brush to blend the colours in, with circular strokes. Whatever you do, make sure that neither the paint brush nor the cotton take away colour from the canvas. You can gently squeeze the colour back on to blend areas on the canvas. Let the first round dry. And work on it again after it dries. Use your markers to dab, not with strokes, on white areas. Your choice if you want to leave the white gaps to show.


This is a process that took me about an hour. So if you left something on the stove thinking this is a quickie project, run and turn that thing off.

Once your art piece has reached a certain level of blending and you want to stop, leave the piece to dry for about 15 minutes. And fix the self adhesive magnetic strips to its rear. If the adhesive does not hold well, you can stick it with multi-surface glue or a glue gun.


Next step: Very important. Fix it on your fridge door! Or gift it to one special friend...

Monday, October 3

Make your own cardboard stencils

Stencilling as an art has gained momentum in the recent years. The creative form that bore the burden of disregard as an uninteresting one, is today the toast of interior decorators.
At home you do not have to invest on expensive damask or chevron stencils if you want them on smaller objects that get get a new lease of look. Grab the cardboard of household boxes and get started. Go for easy to make designs. Intricate cuts are for experts. And think of how little objects can be used.

You will need:

- household products cardboard, plain and pieces with packing slits

- a pair of scissors

- marking pen

- used 3 D or thick stickers or collants

- pen knife or craft knife

- small hole punch

- bangle

- cardboard strip of dark colour

- craft paper or construction paper of light colour

- some brush pens, or stamping pad with paint sponge

- colour pens or pastels


For my little project, I pulled out a flower shaped sticker from my stash of used 3D stickers and outlined it on a piece of product cardboard.

Next on, it was about carefully cutting the shape off with a craft knife. I used this on a sheet with brush pens to colour away.

You can also use paper punches to create some stencil designs.

I used a small hole punch on a piece of cardboard, to create random small holes.
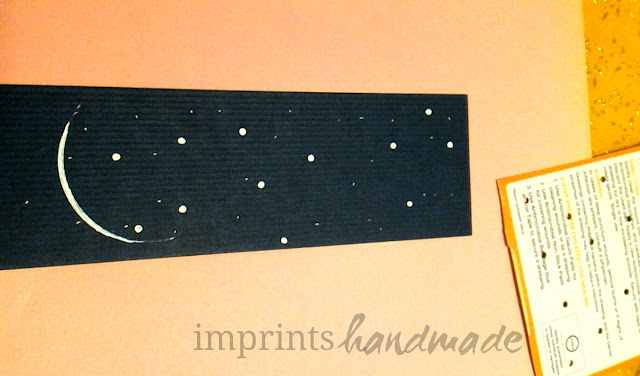
I the placed this cardboard on a royal or navy blue strip of cardboard to create a design for a bookmark.


It was stars, and a crescent moon. I used a bangle to get the shape of the moon right. And dots with a pen to create a night sky.

If you get cardboard with pre-punched shapes to hold a product, you can utilize it to make other designs. 
The piece I had was useful.

I simply coloured inside it's top slit shaped like a plate with a bun, randomly over paper.

And added some stars. They look like flying spaceships. If I had added folk motifs, the design would get a rural touch.

For the festival season, you can wrap gifts in these papers or reach a kid to experiment with designs. Find everyday objects to try.

Pictures by Radhika M B

Write to radicreative@gmail.com

Friday, September 18

How to make plastic bottle cap stamp

Hi all, how did your Ganesha festival go?

Mine was good, super simple and satisfying. I tried something new for the elephant lord's umbrella, that I shall share in a later post. For now though, here is something I have been thinking aloud.

What exactly do we do with plastic bottles that only threaten to gobble up our lives with their volumes? The ideas are many, but there is an option, to recycle them.

We would of course wait for the local recycle shop guy who comes by the doorstep to collect them, in my parents' place.

In USA, the options to recycle plastic bottle caps are limited. It is not encouraged to put bottle and cap together into the recycle bins.

How about thinking up ideas for crafts with such caps? The possibilities are big.

I looked up the internet and was overawed with things one can do! But a simple idea struck me. And that of course is about converting them into stamping tools for home crafts! If you have kids who need to be kept busy, nothing like this.

The project I tried, gives a way out for the thermocol and styrofoam food containers that have inundated grocery stores and supermarkets too.

bottle cap recycle + handmade stamp

That is my new plastic bottle cap stamp, sitting against my favourite mug.

What you need for this super quickie project:

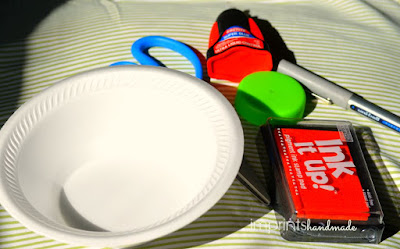
Materials for plastic bottle cap stamp + stamping ink pad + thermocol container


-- a used thermocol or styrofoam container...wash it thoroughly, and wipe off any residue of food

-- stamping pad or alternatively, some paint and brush

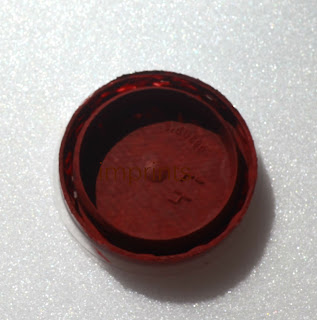
-- important important ....a plastic bottle cap of the size you want

-- a pair of scissors

-- multi-surface glue

-- pen or marker


Next on:

Thermocol container for plastic bottle cap stamp

DIY thermocol container stamp

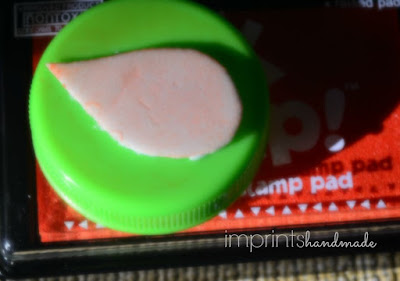
Draw out a shape you like, or make your kid draw one. And cut it. Be sure, to draw on the flat surface of the container...a curved surface may not sit well with the glue.

All that needs to be done now, is to stick the foam on to the cap.

Tips here: 

If you want the glue to sit well on the cap, rub the surface of the cap with sandpaper a little. And delicately roughen up the glue-side of your foam shape.

A problem that may crop up in the project -- the foam sheet may be too thin for the cap if you need it to protrude enough for stamping. As a back up, cut the same shape twice or thrice.

You can use the foam shapes for kid projects that most craft stores sell these days instead of this cut and paste  bit. But using a discardable foam container is more satisfying...what say ya?

Stick on now.
Plastic bottle cap + bottle cap repurpose + make your own stamp + DIY

In case the shape is too thin, or the glue is excess, stick another piece of the shape on top of the current one. And another still if you are not happy with the protrusion yet.

For my piece, I thought the super glue I used was a mistake because it was spreading too much while getting absorbed the foam surface. 

So I cut out another teardrop shape and stuck it on top of the layer, with multi-surface craft glue.

And here it is:
Make your own stamp + plastic bottle cap +

You can stick a layer or two more of the shape, going by the result after stamping...see what works for you.

Styrofoam and plastic bottle cap for stamps

That is how my piece of paper looked after stamping up a little. I love the different texture this stamp brings in. It's gonna be rockin' useful for my projects - bookmarks, greeting cards, gift envelopes and more.

Don't throw away that water bottle cap or grocery item cap. Keep it and experiment.


Pictures Courtesy: Radhika M B

Permissions to use: Write to Radhika M B at radicreative@gmail.com

Sunday, July 28

What to do with Mishti Doi earthen pots?

Once upon a time in Indian Railways, a minister introduced earthen cups for chai, which I thought was a superb idea to replace toxic plastic cups and expensive paper cups. The scheme got into a mess and eventually vanished. I am not sure if any trains still have them.

But every time a friend talks of having collected those kulhars or matkas for later use, I feel elated.

My friend Deepa Balakrishnan sent me these pictures recently. They are matkas, but not of the railway kind. They are containers of mishti doi, the all-famous Bengali sweet sold in Indian cities.

Deepa, with her three-year-old son Kabir, preserved these little pots after using up the Mishti Doi and painted them for decor and gifting. 

Mishti doi

These are two little such painted earthern pots stacked one over the other. Deepa and her son three year old Kabir worked at this cute little project.

They used about five colours of Fevicryl acrylics. Some tips that Deepa gives, when you engage your kid for such a project is -

  • cover the child with an apron as it could get messy
  • spread out a few sheets of newspaper on the floor to avoid staining 
  • the pots are breakable, so it is better to work on the floor so that there is minimal chance of dropping the pot by accident (from the table for instance)
  • it is better to work on two pots at one time, because, once you paint a colour, you need to wait for the paint to dry, at least 30 minutes (the child could get restless)
  • use a combination of thick and thin brushes 
So the materials you need would boil down to -

  •  earthern pots
  • paint brushes of different sizes
  • acrylic colours
  • newspapers
  • apron for the child
  • tissue paper, just in case paints spill
While such a project could be the perfect thing to engage your toddler with on a summer afternoon,  you could use it to nudge the child into being patient with colours.

``Before these pot projects, Kabir would just scratch colours over his colouring assignments at the play-school. I would hold his hand to help him paint these pots. These days, he makes sure the colour is within those printed drawings,'' says Deepa.

She says that since he is used to the painting of pots now, he is not as distracted as he was when they began. Like any other excited toddler, Kabir keeps their guests entertained about how he painted each pot.

Between the mother and child and their grandmom, they've painted several pots. Some of them were gifted by Kabir to friends and relatives too.

Earthen pot mishti doi

Mishti doi pot repurpose


The design above is a common rangoli design used in front of South-Indian homes. It is pictured above their shelf. She also tried warli designs.

painted yogurt pots


painted indian yogurt sweet pots

paint mishti doi pot

So the next time you binge on Mishti doi, you know what to do with the pots instead of trashing them!

As for the costs involved, she spent Rs 18 each for a bottle on the acrylics or fabric colours. The paints are enough to last many more pots, says Deepa. 

You could try out designs with as little as two colours. Just be patient enough with the drying process. Enjoy your next project:)


Pictures courtesy: Deepa Balakrishnan
For permission to use pictures, write to: radicreative@gmail.com

Wednesday, April 24

Plastic water jug cap earrings: My experiment

Pangs of guilt kill me every time I have to toss those One Gallon (3.8 liters) water jugs we haul over from Costco for home use.

My husband and I prefer water from the tap (filtered by the tap-attachable Brita filters). Our family finds it hard though. For over a month, I have stashed those jugs after use, in the hope of making something. But soon my pantry had a mountain of empty plastics mocking at me. With a heavy heart, we dumped them in the Recycle Dust bin outside our apartment.

But I saved the caps. And wondered what to do with them. And wondered. And wondered till I yawned.

My earlier attempt at punching a hole in a sea-shell to make earrings was a disaster. The shell broke into three pieces. This time, I tried a hole-prick with a needle instead, into the cap. It worked!

And yeah, I had some scope for an experiment!

Plastic water jug cap earrings
This was the result. Plastic earrings made from water jug caps.

It was my first ever attempt with plastic caps after a whole lot of dreaming ideas about them. To make it easier for you to try, let me share what exactly I used. Remember this jug? It was what I used to make the ball-catcher some weeks back.

Can water jug - one gallon

I began by pricking a hole into the cap, with a needle. This was because the cap's ridges were making it difficult to use a small-hole punch.

Plastic water jug cap


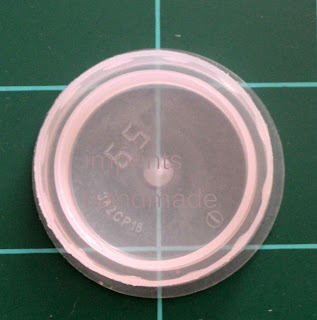
On its inside surface, every such a cap has a number. Unless you want these numbers to show beneath your ears to make a statement, they look tacky.

Obviously, you know by now that we need a needle. Keep a tooth-pick handy to widen that needle-hole. And then, fix a jump-ring. Do the same with another bottle cap.

Next thing, gather your other paraphernalia.

Glue, paint, brushes, Mod Podge

As the picture shows, I used

  • Craftsmart acrylic craft paint (for multi-purpose surfaces) - Brick Red colour
  • Craft glue
  • Mod Podge
  • Paint brushes, flat and thin
  • glue brush -- and I also used
  • four jump-rings
  • two earring hooks
  • nose plier for bending and fixing (you may need a jewellery plier to bend too)
Besides, I had pre-punched flower shapes from postal mail stash, in yellow colour. You could use your imagination with the design though.

Painted water jug cap
I painted the dorsal side.

Point to note here - I should have ideally sand-papered the surface for a start. Painting the cap's smooth surface is a challenge. So you need about three coats to be on the safer side. Use the dab technique, which could make it easier for a start.

Another bit to remember. Use brush strokes from the center towards the edge or from the edge to center after a coat of dab and fill dries. It makes the finish look better. My pieces turned out a li'l faulty. If you look at the pictures close, you will notice the paint peeling at some places. So be careful when you paint.

Water jug caps, painted and unpainted


This is how the cap looks from its main side, after you paint it. Have pictured it against other caps to give you an idea about how different it looks. Use the flat brush and thin brush to fill out any gaps.

Plastic cap earrings

Once the paint dried, I stuck the yellow punched paper flowers on the main side. I had half a thought of doing a design with white paint, but gave it up as this was my first attempt.

Allowing the plastic pieces to dry, I used a coat of Mod-Podge with the glue brush - again, using strokes from the center towards the edges.

After this, I fixed extra jump-rings to the existing ones that were already fixed into these caps. This was because the first set were too stuck into the plastic, with no flexibility. An extra jump-ring gave the pieces some breathing space to hang.

Next step: Fixing the earring hooks. For the jump rings and earring hooks, you will need the nose plier and blunt pliers to bend and turn.

The diameter of each cap is about 1.5 inches. So you know now, that they make the large and flashy kind of earrings. You could use the same jump-ring method to convert the caps, into pendants.

I have not painted on the inside. But when I tried them on, I realised that they would look better, painted on both sides.

The plastic used for these caps is somewhat elastic. It could behave differently when you pick up coloured caps that have screw-ridges. Am yet to experiment with those. If you have done so already, please share info.

Meanwhile, try this out for earrings, and other ideas!

Plastic water can cap earrings


Aren't they cool to wear for summer! Try other colours and designs, using other materials. Maybe you would come up with something better too!


Pictures by : Radhika M B
For permissions to re-use: radicreative@gmail.com

All pics are water-marked. Any re-use requires permission from me.


Monday, January 21

Rangolis on my bookmarks

My love for rangolis on bookmarks continues.

I am a non-traditionalist. Certainly not the kind who washes the doorstep and decorates it with rice flour everyday. But I love the universality of rangolis, with their focus on the center, and expanse from there, the importance of dot...in creation, in design...

This time, I also tried out design inspired by Chittara, the rich folk art of Karnataka.


Rangolis, that adorned the doorstep and verandah in my grandma's home...rangolis, that changed with the festival and season in front of the doorstep at my parents' home.

The material did not have to be much...


This cardboard was what I saved from an earlier purchase of household repair threads. 

Some sandpaper...


And cardstock, known in India, simply as cardboard, with some cutting tools and glue.


I glued the sandpapered  cardboard to the deep blue cardboard, after cutting to a required size. When it comes to cutting the household cardboard, I am really not bothered about a standard size. It is because I want to use every inch of the material possible, instead of trashing it.

That is intrinsic to handmade crafts probably. And I like the lack of identical results.


And after enough gluing and trimming, I used white paint with a size zero paintbrush.

Here is how it turned out:


And here are the bookmarks with Chittara influenced design.


I read about Chittara art, and love the intricacy of this art, though I would not want to agree with its feudal origin based on caste.

Am hoping to use more of it in my other projects.

Try the designs yourself, and you will love yourself for not trashing household cardboard.


Pics Courtesy: Radhika M B
For permissions to use, write to: radicreative@gmail.com

All pics are watermarked.