What happens to those onion and garlic mesh bags once you finish using them? Ever thought of creative ideas with such produce bags?
However hard I try to avoid them, every once in a while, I end up with a plastic mesh bag and wonder what to do with it.
What I tried out has been tried a good deal by creativists across the world. It was still an experiment for me - converting them into a scrubber for use either in bath, or at the sink.
Interestingly, the quick project did not need a drop of glue at any point. Wash and dry the bags before you do any experiment.
What you need for the homemade scrubber:

-- some plastic mesh bags that come with onions or garlic, or other items
-- a pair of scissors
-- tapestry needle with a wide hole
-- plarn (plastic yarn) made from a fairly thick plastic cover
-- optional is a skein of embroidery thread
I had in my stash, plastic netted bags that were bundle-taped at one end, and also bags that were heat-compressed to make for the bottom. The advantage was that I could use the bundle-ended bags to stuff into the flat ended ones.

You will need to cut off the bundle ends. And spread the mesh bag out. Stretch it well, so you can fold it. Do it with two bags.
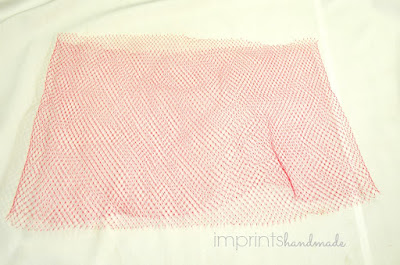
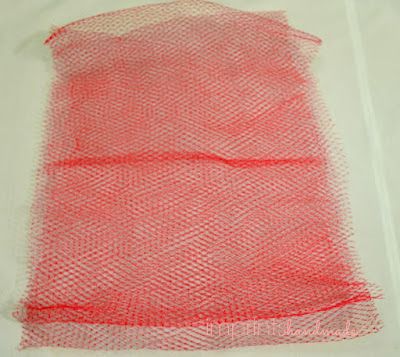
Fold these bags in a way that they fit into the the flat-ended mesh bag. This is trial and error. You can try out the folds in different ways.


Gently push the folded set into the flat mesh bag. Make sure that the edges of these folds do not jut out from the mesh bag.
 Now fold this bag. Thread plarn into your tapestry needle and start sewing the edges. I used button stitch for two sides and overcast stitch on other two sides.You will need to crease the plarn from time to time. It gets rough with each passing stitch too, thanks to the sharp plastic in the mesh.

 Stitch any left over plarn into the existing stitches. Your homemade scrubber is ready. You may use it this way. I had another idea to make it look better.
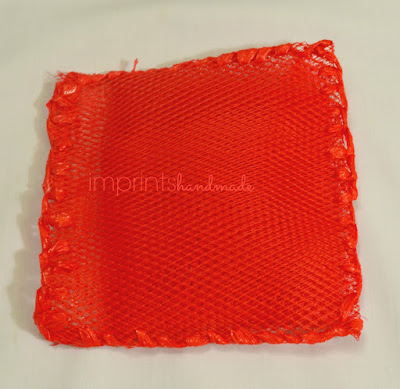
Out came my crochet hook. Using the existing hooks in the edges, crochet a single crochet chain around the scrubber.


I crocheted two lines with the plarn. Stitching plarn on to a plastic mesh, and crocheting it, are more difficult than working them with an embroidery skein or other threads. Do not give up. Here is where you can alternatively try edging off with embroidery skein. Am not sure about how long it would last with the scrubber though.
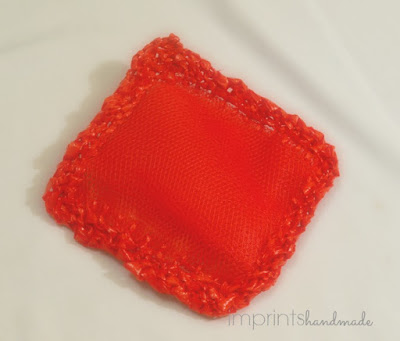 The scrubber is ready for use. I am happy with the result. It is not perfect. It's functional. It is satisfying.
I was lucky to have a red plarn ready. If you do not, try using contrasting colours. Experimenting has no end with such projects. Tutorials to convert a plastic bag into a single plastic yarn exist on the internet. They are easy and fun. If you do not have plarn, try using the plastic thread available from thread stores. Just make sure it is not too sharp on the skin. You can add more mesh bags into the flat ones for a fluffy piece. Fine mesh bags are more suited for bathing, while the rough ones come in handy for dishes in the sink. Use your discretion. At no point should you let the piece of plastic hurt you though.
Try your hand at upcycling those plastic mesh bags and save on some scrubber bucks.
Pictures Courtesy: Radhika M B
For permission to use, write to: radicreative@gmail.com
However hard I try to avoid them, every once in a while, I end up with a plastic mesh bag and wonder what to do with it.
What I tried out has been tried a good deal by creativists across the world. It was still an experiment for me - converting them into a scrubber for use either in bath, or at the sink.
Interestingly, the quick project did not need a drop of glue at any point. Wash and dry the bags before you do any experiment.
What you need for the homemade scrubber:

-- some plastic mesh bags that come with onions or garlic, or other items
-- a pair of scissors
-- tapestry needle with a wide hole
-- plarn (plastic yarn) made from a fairly thick plastic cover
-- optional is a skein of embroidery thread
I had in my stash, plastic netted bags that were bundle-taped at one end, and also bags that were heat-compressed to make for the bottom. The advantage was that I could use the bundle-ended bags to stuff into the flat ended ones.

You will need to cut off the bundle ends. And spread the mesh bag out. Stretch it well, so you can fold it. Do it with two bags.


Fold these bags in a way that they fit into the the flat-ended mesh bag. This is trial and error. You can try out the folds in different ways.


Gently push the folded set into the flat mesh bag. Make sure that the edges of these folds do not jut out from the mesh bag.


Out came my crochet hook. Using the existing hooks in the edges, crochet a single crochet chain around the scrubber.


I crocheted two lines with the plarn. Stitching plarn on to a plastic mesh, and crocheting it, are more difficult than working them with an embroidery skein or other threads. Do not give up. Here is where you can alternatively try edging off with embroidery skein. Am not sure about how long it would last with the scrubber though.

I was lucky to have a red plarn ready. If you do not, try using contrasting colours. Experimenting has no end with such projects. Tutorials to convert a plastic bag into a single plastic yarn exist on the internet. They are easy and fun. If you do not have plarn, try using the plastic thread available from thread stores. Just make sure it is not too sharp on the skin. You can add more mesh bags into the flat ones for a fluffy piece. Fine mesh bags are more suited for bathing, while the rough ones come in handy for dishes in the sink. Use your discretion. At no point should you let the piece of plastic hurt you though.
Try your hand at upcycling those plastic mesh bags and save on some scrubber bucks.
Pictures Courtesy: Radhika M B
For permission to use, write to: radicreative@gmail.com


