Owls are my favourite birds. Contrary to what I heard growing up, owls are wise, and that I say in the affirmative.
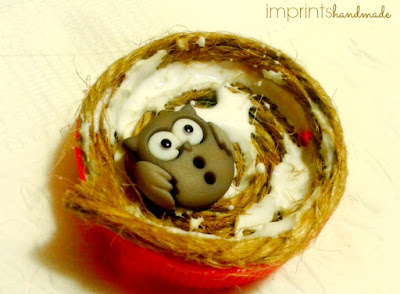
On an earlier visit to the crafts store, I chanced upon owl buttons. They found their way into my cart with no reason to be bought at all. Today I put them to good use. I built a little nest for them in a plastic bottle cap. And made them sit on my fridge door.
Plastic bottle caps that we mindlessly throw away can come handy in a million ways. For the little owl nest, it was a large red plastic cap that made a perfect bowl for the nest.
The materials you need for the project are available easily, except for the owl buttons. You can opt for small owl stickers, stick them up a card board and cut through the shape to give them the 3-D effect, or simply buy 3-D stickers.
Here goes the list:
Roll the thicker twine into a disc that's enough in size to fit into the bottle cap. And glue this into the bottle cap. Use enough glue.
Now pick up those owl buttons or 3-D stickers and glue them on the disc, a little above half of the cap.
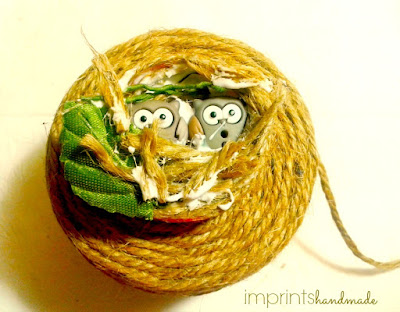
Add more pieces of the jute or burlap twine - thick here, thin there...you can also pull out strands from the pieces to stick randomly and give a mish mash effect. Images of owl nests I came across have mostly been with twigs. Here I have mounted the glued owls on a large twine roll.
Let the piece dry out a little. And add the self-adhesive magnet. If the adhesive does not stick well, glue it with tacky glue.
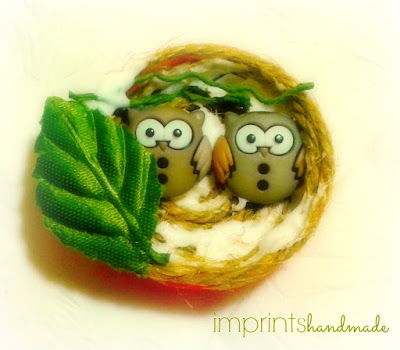
Here they are, the owls, drying out in the bottle cap nest.
They acquire a different glow, almost Christmas tree like, when an LED bulb shines on them. If you want to quick dry them, try using a hair dryer in `cool air' setting. After an hour of drying, the piece is ready to sit on my fridge.
This little DIY piece makes for an excellent gift that you can stash into an old earrings box and give away. You can earn those `recycled' stars with ease among peers. Get your kid to do this for a school crafts project. Or simply enjoy its beauty on your fridge.
If you do not have owl buttons or stickers, use tiny pebbles that look like eggs, or oval beads of plain colours. Enjoy the company of your new friends.
Pictures courtesy: Radhika M B
For permissions to re-use, write to: radicreative@gmail.com
Copyrights: Radhika M B
On an earlier visit to the crafts store, I chanced upon owl buttons. They found their way into my cart with no reason to be bought at all. Today I put them to good use. I built a little nest for them in a plastic bottle cap. And made them sit on my fridge door.
Plastic bottle caps that we mindlessly throw away can come handy in a million ways. For the little owl nest, it was a large red plastic cap that made a perfect bowl for the nest.
The materials you need for the project are available easily, except for the owl buttons. You can opt for small owl stickers, stick them up a card board and cut through the shape to give them the 3-D effect, or simply buy 3-D stickers.
Here goes the list:
-- Owl buttons
-- a self adhesive magnet
-- plastic bottle cap
-- a pair of scissors
-- jute or burlap twine - one thick and one thin
-- cloth leaves that you get from craft stores for flower making projects
-- a tweezer to nudge the twine into the cap properly
-- straw or stirrer to use tacky glue
-- tacky glue
Roll the thicker twine into a disc that's enough in size to fit into the bottle cap. And glue this into the bottle cap. Use enough glue.
Now pick up those owl buttons or 3-D stickers and glue them on the disc, a little above half of the cap.
The flowers project leaves usually come with a wire attached. You can cut this wire and add randomly into the glued area, and fix the leaf on the bottle cap edge. The leaf can also go in before the owl buttons do, so you can nestle them on it.
Add more pieces of the jute or burlap twine - thick here, thin there...you can also pull out strands from the pieces to stick randomly and give a mish mash effect. Images of owl nests I came across have mostly been with twigs. Here I have mounted the glued owls on a large twine roll.
Let the piece dry out a little. And add the self-adhesive magnet. If the adhesive does not stick well, glue it with tacky glue.
Here they are, the owls, drying out in the bottle cap nest.
They acquire a different glow, almost Christmas tree like, when an LED bulb shines on them. If you want to quick dry them, try using a hair dryer in `cool air' setting. After an hour of drying, the piece is ready to sit on my fridge.
This little DIY piece makes for an excellent gift that you can stash into an old earrings box and give away. You can earn those `recycled' stars with ease among peers. Get your kid to do this for a school crafts project. Or simply enjoy its beauty on your fridge.
If you do not have owl buttons or stickers, use tiny pebbles that look like eggs, or oval beads of plain colours. Enjoy the company of your new friends.
Pictures courtesy: Radhika M B
For permissions to re-use, write to: radicreative@gmail.com
Copyrights: Radhika M B


No comments:
Post a Comment