Hi all, how did your Ganesha festival go?
Mine was good, super simple and satisfying. I tried something new for the elephant lord's umbrella, that I shall share in a later post. For now though, here is something I have been thinking aloud.
What exactly do we do with plastic bottles that only threaten to gobble up our lives with their volumes? The ideas are many, but there is an option, to recycle them.
We would of course wait for the local recycle shop guy who comes by the doorstep to collect them, in my parents' place.
In USA, the options to recycle plastic bottle caps are limited. It is not encouraged to put bottle and cap together into the recycle bins.
How about thinking up ideas for crafts with such caps? The possibilities are big.
I looked up the internet and was overawed with things one can do! But a simple idea struck me. And that of course is about converting them into stamping tools for home crafts! If you have kids who need to be kept busy, nothing like this.
The project I tried, gives a way out for the thermocol and styrofoam food containers that have inundated grocery stores and supermarkets too.
That is my new plastic bottle cap stamp, sitting against my favourite mug.
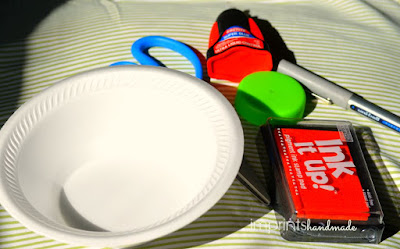
What you need for this super quickie project:
-- a used thermocol or styrofoam container...wash it thoroughly, and wipe off any residue of food
-- stamping pad or alternatively, some paint and brush
-- important important ....a plastic bottle cap of the size you want
-- a pair of scissors
-- multi-surface glue
-- pen or marker
Next on:
Draw out a shape you like, or make your kid draw one. And cut it. Be sure, to draw on the flat surface of the container...a curved surface may not sit well with the glue.
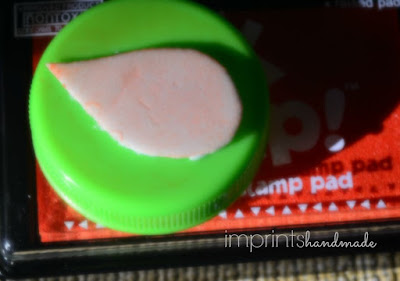
All that needs to be done now, is to stick the foam on to the cap.
Tips here:
If you want the glue to sit well on the cap, rub the surface of the cap with sandpaper a little. And delicately roughen up the glue-side of your foam shape.
A problem that may crop up in the project -- the foam sheet may be too thin for the cap if you need it to protrude enough for stamping. As a back up, cut the same shape twice or thrice.
You can use the foam shapes for kid projects that most craft stores sell these days instead of this cut and paste bit. But using a discardable foam container is more satisfying...what say ya?
Stick on now.
In case the shape is too thin, or the glue is excess, stick another piece of the shape on top of the current one. And another still if you are not happy with the protrusion yet.
For my piece, I thought the super glue I used was a mistake because it was spreading too much while getting absorbed the foam surface.
So I cut out another teardrop shape and stuck it on top of the layer, with multi-surface craft glue.
And here it is:
You can stick a layer or two more of the shape, going by the result after stamping...see what works for you.
That is how my piece of paper looked after stamping up a little. I love the different texture this stamp brings in. It's gonna be rockin' useful for my projects - bookmarks, greeting cards, gift envelopes and more.
Don't throw away that water bottle cap or grocery item cap. Keep it and experiment.
Pictures Courtesy: Radhika M B
Permissions to use: Write to Radhika M B at radicreative@gmail.com


No comments:
Post a Comment