Hi everyone,
Lest you thought I vanished from Imprints..., news is that ill-health kept me at bay. For weeks. God's grace, that I am finally able to sit at the computer and pen these words.
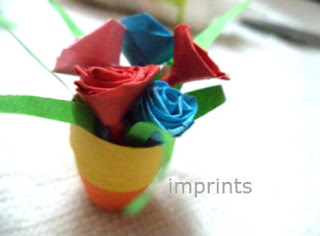
My young friend Pooja sent me these laboriously taken pictures of her cute little paper-quill flower vase project a few weeks back.
It is only now that I have been able to post this though. Enjoy following this elaborate paper-quill picto-tutorial.
Is this not a lovely little skill-piece? Wait...there is more to it!
High-schooler Pooja has been generous to share her project, step-by-step.
First, about the materials.
A flower pot using paper quilling has two components - the container that evolves as you roll your paper, and carefully made paper roses.
She began by making the container. Her pictures are self-explanatory.
Roll the orange strip of paper. Once you reach the end of the paper, add some more by glue the edge.
Notice here, that she uses the orange for the base of the quill-vase. And then fixes a yellow quill-strip, to proceed further.
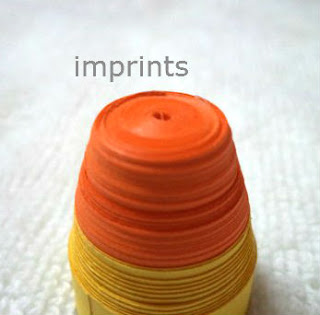
That's her vase base taking shape. Once done with rolling, she uses glue at the edge to stick it up. Now, using her thumb, she gently pushes the central part of this disk so it protrudes on one side. She makes sure to keep some base intact though, while she nudges the rest of the roll.
The quilled biscuit-like piece has now turned into an elegant conical container.
Pooja gives us important tips here. To keep the base of this cone flat, you need to press the end of the cone against a flat surface, for that base to set up.
She additionally used glue to firm it up. It means, rubbing the glue on the newly formed container helps the piece to not lose its shape.
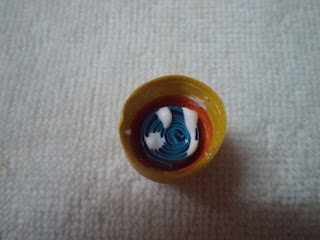
Please bear with the fuzzy picture here - it is the vase with glue in it. This vase only needs a bunch of flowers. And so the next part of the project is, roses.
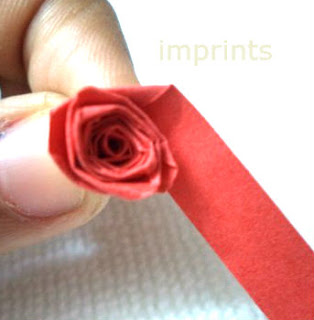
Pooja sent me this link of a quickie look at how these roses can be made using simple fold technique.
http://www.youtube.com/watch?
Pooja has sent pictures for them too. Check the pictures, but make sure you watch the video too.
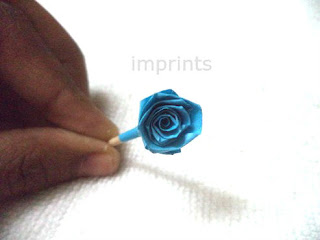
The roses look as real as they could get, don't they?
Once the roses are ready, about a bunch of them that could give a good look when together, it's time to give them stems. And it's where toothpicks come in handy.
Do this with all the available roses.
Now, with some remaining quill-paper, make a coil similar to the disc you saw in the earlier pictures, but not as firm. This would have to be a smaller base than that of the vase. It is to make fixing the rose stems easier. Pooja says the coil loosens up a little while you fix it.
Next step: apply glue on this coil, and arrange the roses. Use your judgement and place them the way you would arrange flowers in a vase - for the bunch effect.
All that the vase now needs, is some green element for a more natural feel. So pick up some green strips of quill-paper and cut one end of each strip into cones, or rather, give a rough triangle shape to the pieces so they resemble blades of grass.
And you are done! You could bend these `blades of grass' a little too.
With such a cute vase around, you won't have to spend precious bucks on heavily transported roses all the time! You could give this as a birthday gift too! Or place it on a dear one's table as a surprise.
Pooja suggests that you make your own varnish using - equal parts of glue (of the Fevicol variety) and water. Use a paint brush to apply a coat of this over the flower pot, so that it glosses and firms up too.
My only wish is that such a project got done by anyone willing, with newspapers and old magazines. Needs patience and effort, but will be worth it.
Meanwhile, a big thank you to Pooja for sharing this wonderful home project with Imprints Handmade. Hope you like this project too, and are willing to try it out with kids and elders alike.
Please note: all pictures have been clicked by Pooja Komarath.
For permission to use the pictures, write to: radicreative@gmail.com
Lest you thought I vanished from Imprints..., news is that ill-health kept me at bay. For weeks. God's grace, that I am finally able to sit at the computer and pen these words.
My young friend Pooja sent me these laboriously taken pictures of her cute little paper-quill flower vase project a few weeks back.
It is only now that I have been able to post this though. Enjoy following this elaborate paper-quill picto-tutorial.
Is this not a lovely little skill-piece? Wait...there is more to it!
High-schooler Pooja has been generous to share her project, step-by-step.
First, about the materials.
- a pair of scissors
- Glue - in this project, she has used fabric glue
- quilling paper in yellow, orange and green colours (yellow and orange paper strips need to be of the same width)
- paper quilling tool, and
- toothpicks
A flower pot using paper quilling has two components - the container that evolves as you roll your paper, and carefully made paper roses.
She began by making the container. Her pictures are self-explanatory.
Roll the orange strip of paper. Once you reach the end of the paper, add some more by glue the edge.
Notice here, that she uses the orange for the base of the quill-vase. And then fixes a yellow quill-strip, to proceed further.
That's her vase base taking shape. Once done with rolling, she uses glue at the edge to stick it up. Now, using her thumb, she gently pushes the central part of this disk so it protrudes on one side. She makes sure to keep some base intact though, while she nudges the rest of the roll.
The quilled biscuit-like piece has now turned into an elegant conical container.
Pooja gives us important tips here. To keep the base of this cone flat, you need to press the end of the cone against a flat surface, for that base to set up.
She additionally used glue to firm it up. It means, rubbing the glue on the newly formed container helps the piece to not lose its shape.
Please bear with the fuzzy picture here - it is the vase with glue in it. This vase only needs a bunch of flowers. And so the next part of the project is, roses.
Pooja sent me this link of a quickie look at how these roses can be made using simple fold technique.
http://www.youtube.com/watch?
Pooja has sent pictures for them too. Check the pictures, but make sure you watch the video too.
The roses look as real as they could get, don't they?
Once the roses are ready, about a bunch of them that could give a good look when together, it's time to give them stems. And it's where toothpicks come in handy.
Do this with all the available roses.
Now, with some remaining quill-paper, make a coil similar to the disc you saw in the earlier pictures, but not as firm. This would have to be a smaller base than that of the vase. It is to make fixing the rose stems easier. Pooja says the coil loosens up a little while you fix it.
Next step: apply glue on this coil, and arrange the roses. Use your judgement and place them the way you would arrange flowers in a vase - for the bunch effect.
All that the vase now needs, is some green element for a more natural feel. So pick up some green strips of quill-paper and cut one end of each strip into cones, or rather, give a rough triangle shape to the pieces so they resemble blades of grass.
Glue these strips into the vase, between the roses.
And you are done! You could bend these `blades of grass' a little too.
With such a cute vase around, you won't have to spend precious bucks on heavily transported roses all the time! You could give this as a birthday gift too! Or place it on a dear one's table as a surprise.
Pooja suggests that you make your own varnish using - equal parts of glue (of the Fevicol variety) and water. Use a paint brush to apply a coat of this over the flower pot, so that it glosses and firms up too.
My only wish is that such a project got done by anyone willing, with newspapers and old magazines. Needs patience and effort, but will be worth it.
Meanwhile, a big thank you to Pooja for sharing this wonderful home project with Imprints Handmade. Hope you like this project too, and are willing to try it out with kids and elders alike.
Please note: all pictures have been clicked by Pooja Komarath.
For permission to use the pictures, write to: radicreative@gmail.com











how long is the strips
ReplyDelete