Monday, July 28

Ganesha on my coffee mug

Wanna do something on a rainy day? Ran out of ideas?

Grab a permanent marker and try out something on a coffee mug. You'll be surprised how much you can come up with.

Sharpie marker Ganesha on ceramic mug
I must confess that I have never tried that. But my dear friend Ashwini of Indulge Ashscorner blog did. And am yearning to do that sometime soon. In thepicture above, Ashwini has made her favourite abstract design of Lord Ganesha, and needless to say, these mugs were an instant hit with her friends.
Warli with Sharpie marker on coffee mug


Out here in USA, Sharpie is a popular brand of permanent markers. Guess in India, Staedtler and Camlin would do the needful. Am looking forward to feedback from anyone who has tried them on ceramics.

Sharpie marker mug floral design
All you need for this craft, is

1. Plain coloured ceramic mugs

2. Permanent markers (Sharpie, or equivalents)

3. An oven to bake them after making the design

Ashwini has some tips for this project though. 

She suggests, that you use an oil based marker as the regular marker may fad away, or scrubbing to wash may erase the design.

She says:

- a thicker design works better - for better look and holding

- bake it hot in a normal oven, at 400 deg F for 30 minutes

but as she puts it, each oven has its differences.

- hand wash the mugs, skip the dishwasher.

Since Ashwini tried these experiments with a kitchen oven here in US, she does not know how much time an OTG oven in India may take to bake it for instance.

But those who are into terracotta jewellery making could try it out in their ovens and provide feedback.

Easy warli with Sharpie markers on ceramic mug

A couple of other tips I found through googling, throw up the following bits:

- a blogger notes that letting the designed mugs dry for 24 hours before baking helps

- a couple of other blogs have revealed that microwave may not be a good option

so you shall be lucky if you have a normal oven in India.

---


Pictures courtesy: Ashwini Deshpande

For permission to use the content: radicreative@gmail.com


Monday, June 16

Master strokes and tiny hands: Child Art

As an aspiring painter, I routinely browse Google Images to get inspired by masterpieces, everyday painters, blogs on drawing and painting and even try to learn from
videos online.

For years though, I have struggled to push myself, to paint. Somehow, the anxiety to create has been overwhelming. You may wonder why I am writing this post on my craft blog.

Crafting, is about creating, just like painting is. Someone who I admire greatly - an illustrator colleague with decades of experience from my earlier workplace, nudges me on each time I talk. He took to painting full time after retirement.

What he told me during my call two months back struck me the most. It prompted me to just grab the canvas and apply colour, without thinking much.

`Paint like a child. Don't wonder or fear how the painting will turn out. It has to be something that comes with your own discovery,'' he said.

This colleague went on to tell me how some painter friends, lament not being able to paint like a child, having honed themselves over the years thoroughly with techniques.

I have barely used two canvases since then, because my Artist table has been acting funny. But I started. Finally. Because I did not care how the paintings would turn out.

But am pasting here some pieces by kids of my friends and family, to make that point. Before I proceed though, here is a confession. These pictures have been sitting in my gadgets for quite a while. Apologies, dear senders, for this big a delay.

That is a picture of Snowman, by my neighbour's son Sarvesh. I love the buttons on Snowman's snow-shirt. Sarvesh, is a pre-schooler. The picture below is by my niece Smritti, who lives in Dubai. I loved her desk full of her art work. But this drawing floored me the most.

I had clicked this in her bedroom. After a few weeks, my niece sketched her dad's pic in pencil. And here it is.

Don't these pics make you fall in love with the kids even more? Straight from the heart, uncorrupted, full of love!

There is more...Scroll on.

Dia, my friend Nisha's daughter, made me want to hug her when I saw her drawing. Dia made a picture of herself among flowers in a garden.

Notice the sun, the flowers, the grass and the `V's. The big Vs are apparently Eagles, according to Dia. And the small Vs, little birds! Love you Dia, for this!


Her next one:
It is a garden picture. But also has a cat to go with it, besides a tree, and a bird flock flying above Dia's head. Love her perception. Pasted below is a self potrait. Priceless.

Refinement may make one polished with technique and craft. But watch these pictures and you marvel at a child's abandon in playing with markers and crayons on a piece of paper. No inhibitions of who will say what about the art, except may be a hug or `good job' from Mommy. They radiate innocence unblemished.

Below is a picture of Chota Bheem, the all popular cartoon character in India. My nephew Lohith who loves using his sketch pens over paper, found a white piece of styrofoam or thermocol lying around. And took to it. He is six years old. And loves Chota Bheem crazy.  His favourite hero comes alive in the sketch.


 Under guidance though, art could take on a different dimension. Scroll to understand.
Here is Chota Bheem in a coloured format, by my nephew.


And here are the sketching efforts by Smritti, through her drawing class at school.


It's how we too were taught in school - shade the objects for the right light effect. For her age - all of nine years, this is commendable effort. I would still cherish her daddy-mommy pictures which are the masterpieces.

Here is another picture, by Tamara, the beautiful school going daughter of my friend Teresa Rehman.


Many years back, an artist I met as part of work, showed me his visual novel in the making. The book was a delight. What caught my attention was the extensive use of child art in its imagery. He recalled, how every stroke by a child is poetry. You can read about it here.

And that we as adults insist on their making good pictures, with no idea of what a good picture is. He wanted to show respect to art by kids.

For those of you wondering why a post on child art now, I looked at it as a perfect way of celebrating this blog's hit count touching 1,00,000 anytime now.

Two years back, I had never dreamed of it. Now it makes me want to dream more. I hope to post more. With your continuous outpouring of love, dreams can come true after all.


Pictures Courtesy: Respective moms of the kids featured here

Permissions: These pictures may not be reused at all, for non commercial, commercial, personal work, whatever be the purpose.


Thursday, June 5

How to make: paper-quill owl earrings and paper quill owl hair clip

Forgive my indulgence with paper quilling in Imprints. As someone who has never tried it, I continue to be intrigued by the wonders a little bender of a quilling tool and strips of papers can do.

Some day I hope to master the craft that seems to have taken my home country by storm. More importantly, some day I hope to make paper quill usables, with recyclable paper at that.

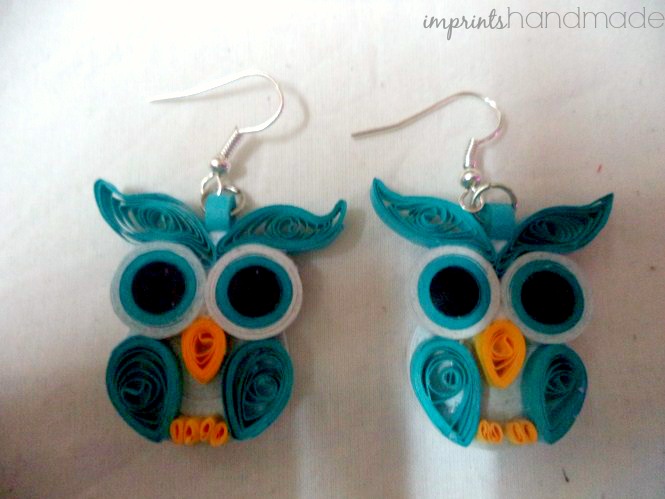
In this post, am featuring the beautiful owl earrings made by my teen pal Pooja, whose enterprise I love. Pooja who has finished her 10th grade, has already started selling paper-quill and terracotta jewellery online.


I fall for anything owls. There's something magnetic about owls.

On any visit to a thrift store, craft store, or a decor aisle in general stores, you can find me gawking lovingly at owl stuff.

Have always wondered why the wise bird must suffer ignominy in my religion. It is the vehicle of Goddess Lakshmi, who represents wealth and well-being. Somehow conveniently the bird has become a negative symbol, and faded into oblivion. To me, those luminous eyes are as good as the eyes of Lord Jagannath.

Back to Pooja's exhaustive paper-quill owl earrings tutorial, and bonus: an owl paper quill hair-clip!

Here goes:


What you need to make this...

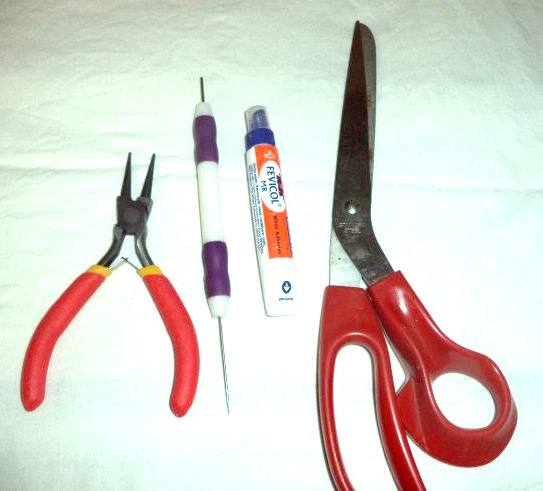
...a handy nose plier

...paper quilling tool

...craft glue, or Fevicol, or general glue


...without doubt, a pair of scissors

...quill worthy paper in the following colours (figure out your own combo based on what you want to experiment with)


Pooja used Teal blue, Deep yellow, Black and White/off-white for the eyes. Pooja says you need 12 strips of white quilling paper. Two strips of Black, and two strips each of deep yellow for the beak and claws.

Of the Teal Blue you need about 10 strips.

You also need:


...jump rings and fish hooks


For a start, she shares this picture of paper quill shapes and what they are called. Click on the picture to enlarge.

 This picture has been sourced from devianTart. I do not know the original source, but it is a handy chart if you are new to paper quilling.

Divide the 12 strips of white quilling paper into -- 10 for the body, two for the eyes. You will understand why, when you read on.

Keep the two strips aside for use later. Now, these 10 strips must be divided into five each for each earring.  Begin, by rolling the white strips.

This, is for the owl's body.


You need to make sure, to roll it into a tight disc. After finishing with one strip, add some glue to its end, and stick the second strip on.
 Go on and use a total of five strips each for the body this way. Glue the last bit of the white strip at the end of the disk, on to the disk itself. You now have two diskettes for the body.

Some bits to remember here, says Pooja:

- you must use quilling paper of 3 millimetres width

- thin paper only...thick paper a big no

Next, the eyes.

Roll half a strip of black quilling paper into a tight roll. 


  Together, the eyes require two white strips, two black strips and two teal blue strips. Which means, you must cut each strip into half, which will give you six strips for each eye.  It means a total of 12 strips, six-six (6-6)

Roll the black strips, apply glue towards its end, and attach the blue strip. Roll the blue strips on, and next, attach the white strips. Now you have the eye disks. Use the same method for the other eye too.

Make four `eyes'.


Next, the ears.


 Make a loose coil in Teal Blue strips and pinch the ends. Refer to the chart that we have put up above by scrolling up.

After this, curl the ends of the tear drop shape to turn it into the shape of a leaf or marquise.


Make four such curled leaf pieces for forming the ears. 

Make sure, that all the four are similar in size.


Next step:

Make the beaks. Here is how - cut a deep yellow strip into half. Roll these two halves separately into loose disks. And pinch one end each, to turn them into teardrops.


Join the eye balls you have made, on the depth-surface periphery of the diskettes.

Now, glue the beaks on. See pic below for reference. 
The beak is glued exactly under the joined ends of the eyes.
What is blurred in this picture, is the extra glue that pooja applied on the top end of the eyes.
The extra glue, is meant for the ears.
As you notice in the picture above, once you are done with the ears and the beak, it is time to fix the whole set on to one end of the body.
You ned to keep in mind, that the tip of the beak somewhat crosses the center of the white body diskette.
Next: the wings

To make the wings,

take two strips of the teal blue quilling paper, cut them into halves. Now you have four strips. Make four loose rolls from these strips with one each. Stick their ends on. Pinch each loose diskette that has formed, on one end, to make a teardrop shape. And now, glue one side of  each of these teardrops, the way it is shown in the picture above.

Stick it on to the body, just below each eye, and adjoining the beak. See pic below.


Once you are done with both the owls, this is how they could look, like in the picture below.
You will notice the other additions in the picture below - claws or feet. Scroll down for how to make them.


Cut a yellow strip into one inch long tiny strips, eight of them.

Place them into the quilling tool and roll them on to get super tiny rolls. These rolls need to be oval in shape, at least one end of them pointed downwards.

Stick them all between the wings, four for each owl, on the white body diskette of each of them.
The main part of  your earrings is ready.

You still have some quilling left though! You need to make the connectors that will hold your owls and the jumprings which will in turn hold the fish hooks.


 Cut a blue strip into half, make two rolls in such a way that there is a hole in the center of the tiny disks.  

Grab the nose plier.

Fix the jump rings one into each of these two disks. And fix the fish hook's loop in to the jump ring. 


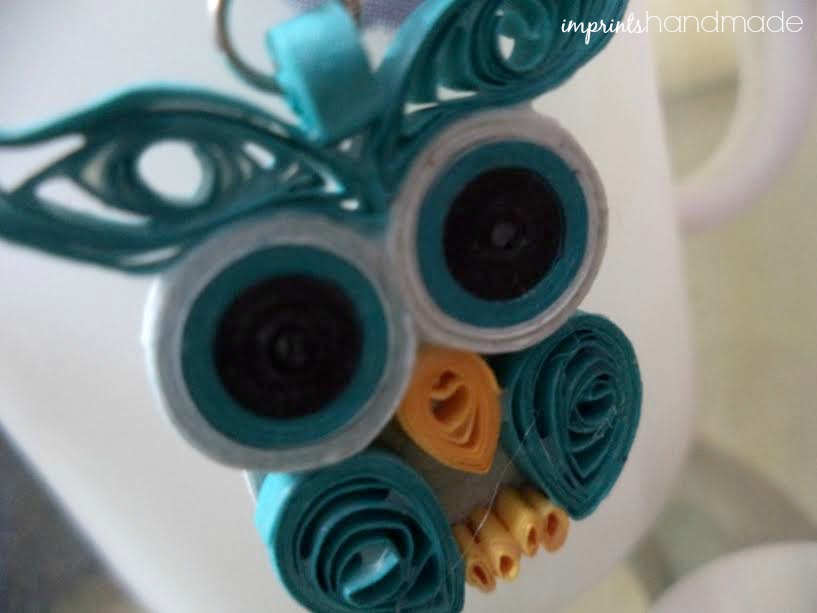
Glue the quilled end of this set, to the main body of the owls, in such a way that the height side of the tiny blue diskette shows up towards you. This has to be fixed, between the ears. See picture below for reference. These are the freshly glued earrings.

Let them dry a while. You can varnish these earrings by either using craft varnish, or, with homemade varnish.
To make your own varnish, mix glue and water in equal portions, thoroughly.

Brush it on to apply. Your owl earrings are now ready.

HAIR CLIP:
Besides all the paper quill strips that you used for making the owl earrings, you will need...
Snaps barrette 


Super glue or Fevikwik - usually available in hardware stores or home DIY aisles of others

Please note that this quickie tutorial is for a single hair clip. So use your discretion for the number of paper quill strips accordingly. 
Make the owl in the same method as for the earrings, but do not make the jumpring connector. 

If you wish to varnish it, this could be the time to do it. Let the varnish dry off before you glue it on.

Squeeze in some drops of super glue or multi-surface glue on to the wider end of the barrette. 

Place the quill owl on these drops and hold the two tight for a few seconds. Avoid touching this glue with your hands. It gets very messy when it touches your skin.

Let it dry.

Enjoy wearing your fancy clip, and the gorgeous earrings.

You can try making owl earrings in other colours too.

Kindly note, this tutorial is thanks to Pooja KV, who painstakingly shot pictures of her work and sent to us.

For permission to re-use these pictures in any form, you will need the permission of Imprints Handmade and Pooja.

Write to: radicreative@gmail.com

Still better, drop in your comments. We love comments!

Spread the love. Share this post with your friends.