Saturday, October 10

Plastic gift card or credit card fridge magnets : How to make

Plastic credit cards and gift cards are a bane, in spite of their convenience. They are a pain once past expiry date or use, which is when you twiddle thumbs about what to do with them.

They get tucked away in some wallet, occupying space and raising the wallet weight, or pop up in between books and desktop chaos, prompting you to trash them.

You do not need to trash them if you can put some energy into upcycling them, or engage your kids to do some project with them.

I made fridge magnets. And am tempted to make more.

I made three magnets with two methods. The result is somewhat different with them.

Keep the following materials handy for the two methods:


how to make gift card gift magnets

-- peel and stick square magnets
-- sanding sponge or sandpaper
-- old nail polish or acrylic paint with brush

-- decorative stickers
-- decoupage glue and sealant (I used Martha Stewart...you can try it with Mod Podge)
-- variety of card paper or card stock
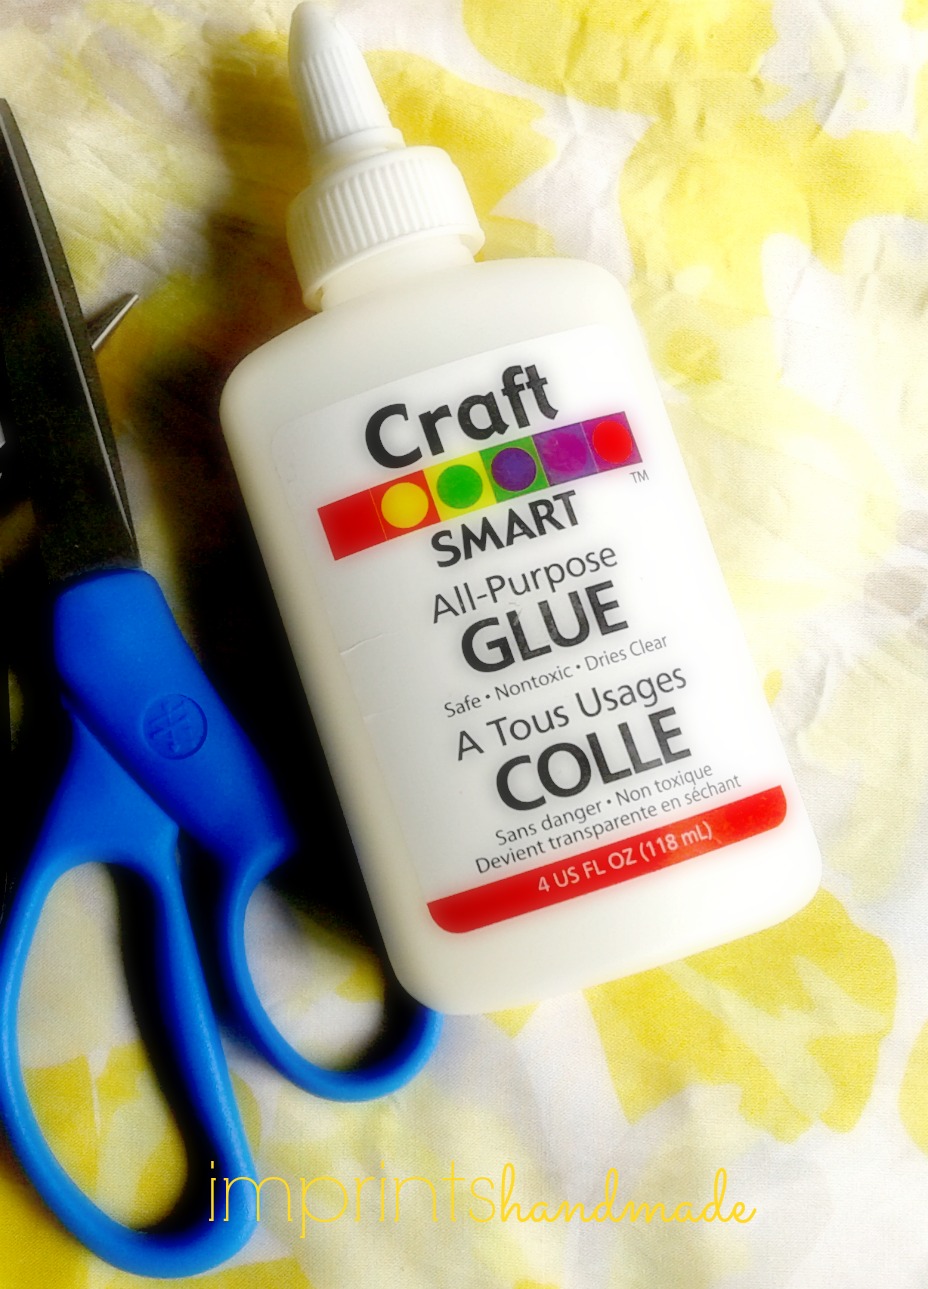
-- multi-surface craft glue, and do not forget

most importantly -- used and old credit cards  and gift cards

how to repurpose credit cards and gift cards as fridge magnets


a pair of scissors to make gift card fridge magnet

-- a pair of scissors...

The picture below is of square magnets

Magnet squares one inch + credit card gift card upcycle

METHOD ONE:

I picked up a red piece of paper from my cardstock book and kept aside.

1. You need to use the sand paper, to roughen up both the sides of the plastic credit card or gift card.

2. And glue the plastic card to the cardstock neatly.

3. Let it dry.

4. Use the nail polish to draw out a design. I made a  rangoli to blend with the red-oxide floor like paper - and added the word `Home'


5. Apply decoupage glue and sealant -- two coats is ideal. First coat adheres, second seals. This gives the piece a glossy finish

6. Once both its sides dry out from the sealant's stickiness, peel and stick the square magnets to the decorated card's rear

DIY Fridge magnets

In this picture are -- the rangoli design credit card and my favourite cartoon sticker on another card, both smeared with the decoupage glue and drying out.

METHOD TWO:

You can avoid using the sandpaper to sand the card for this. Such a method is useful for people allergic to the fine powder emanating when you sand the card.

1. Fold the card stock over the card, in a way you would gift wrap a small gift - folds and tucks, and all

Credit cards and gift cards for fridge magnets

Here I have cut out the protrudng parts so I can tuck them into the folds. This design I have tried with the black paper. A similar effort went into the green cardpaper. Make sure you glue out any dry gaps. And the paper must stick to the paper and not the plastic beneath it.


DIY recycle credit cards and gift cards + refrigerator magnet

2. Fix your favourite sticker and use the decoupage glue to give its front and back sides a glossy finish.

Snoopy sticker for credit cards fridge magnets


3. Let the cards dry

4. Peel at least two pieces of magnet each from the magnet strips, and stick firmly on the rear side of these cards.

If need be, give these another coat of sealant for the shine and longevity.


Your brand new fridge magnets are ready to sit proudly on the fridge.

Green craft + credit card fridge magnets + cause magnets

Here they are - the Snoopy magnet or Peanuts magnet, rangoli magnet, and I love Slow Food magnet.

A credit card on my fridge


I am happier with the sanding and sticking method for its firmness. If you have other ideas, please implement and send me the pictures.

Do It Yourself + Make it Yourself fridge magnet


I hope to make differently shaped magnets someday. But be rest assured that these rectangles will do the job just fine.

Go ahead and try your bits for the fridge magnets.

PICTURES COURTESY: Radhika M B

For permissions to use, write to: radicreative@gmail.com

Kindly avoid use of Snoopy picture. It is for representation only.

Saturday, October 3

DIY styrofoam cup pin cushion safe: How to

Styrofoam containers and plates are a bane. Unavoidable at times, disgusting otherwise all the same. These days I prefer eating out a great deal. But these containers which we must pack our leftovers in only scare me. All the same, how to dispose them off is a bigger question.

One option: do not dispose them off. Re-use them, but just do not re-use them to store food.

I decided to give the containers we got home last week, a dual use.

A styrofoam container that can hold pins and toothpicks, and hide away some precious things I do not want lying around. You could try out this at home with broken plastic cups too.


I admit the decor is not all that great. But the good part is, I can use the same cushion in a different container of the same size.

1. Things you need for this project:


-- cotton balls or cotton batting

-- Styrofoam or thermocol food container or cup (don't go scurrying to buy one..wait till you get one)

-- Felt sheet (one or two depending on your choice of colour - I ended up using a whole sheet of mustard yellow and a strip of deep red)

-- Saree border (one and half inches width) to embellish

-- some thread, the embroidery variety and needle

-- a pair of scissors

-- some pins to stick on the cushion when it gets done

-- embellishments such as stickers are optional

-- keep some sand paper handy too

-- also,
you need craft glue - multipurpose

2. The how to of it, 

Fold the felt sheet into four. And cut it to make it a round...I ended up with an oval shape. But circles are better.

Spread this out.


3. Keep a knotted thread in the needle ready for stitching. Fill cotton balls or batting into the centre of this shape, and cup the felt sheet around it to cover it up as much as possible. Remember you will need to hold this in one hand, and pick up.

Now, pleat the felt where its edges converge, similar to how you would pleat a saree.

4. Stitch through the pleats.


Leave enough gap for a finger to dig in so you can adjust the shape of this cushion in such a way, that it fits into the container. If you wish, you may tuck in another piece of felt into the gaping hole. I decided otherwise.

5. Use sand-paper to sand the side of this cup to embellish.

Recycle + upcycle styrofoam container + jewellery stash + earrings safe


How to make jewelry safe with pin cushion + DIY

6. Glue the saree border over slowly on this sanded surface. Remember that this can be tricky as the strip does not fit into the conical shape of the container. Either pleat it to stick better, or cut a little at intervals, from the lower edge.

Make a pin cushion safe for your jewelry + recycle styrofoam container

You can glue up the top end of the cup with an extra piece of felt.  

7. Hide away your little pieces of jewelry, keys, or simply a secret note. And tuck the cushion on it.

The pin cushion safe is ready. 

how to make pin cushion and hideaway safe with thermocol cup

Reuse styrofoam cups to make pin cushion and safe

If you do not want to use this as a hide-away for your items, you can go ahead and glue the cushion to the container's base inside.

Tips: My piece is not perfect. An option would be to embellish with stickers, as the smooth surface of the styrofoam can prove a challenge

Make sure you have enough cotton to fill. You can alternatively use tailoring waste, rolled up plarn (plastic yarn), or crumpled paper to add to the stuffing.

Do not aspire to make the most perfect piece for a start. You need something functional. Better pieces turn out with practice.

Good luck with your little project.

Pictures Courtesy: Radhika M B

For permissions to reuse, write to: radicreative@gmail.com

Wednesday, September 30

DIY Ganesha to go green this festival

Every year brings heartwarming efforts on the part of devotees to worship their favourite elephant god by respecting the earth that nurtures us. Every year brings heartbreaks too, when visuals of post-festival idols turn garbage of toxic proportions on our beaches.

The silver-lining - over the years, I see more interest in the effort to stick to unpainted clay Ganeshas, or to innovate with other materials.

Here is a quick round up of this year's efforts, as Navratri grandeur approaches soon.

My friend Hema Sampath, who misses her trips to Lalbaug Raja every year at Mumbai, continued her personal tradition of Ganesha worship this year. She dunked the painted Ganesha idols, for a homemade one.


``I had the clay in my fridge. I had kept it for my craft work. It came in handy for my Ganesha instead,'' says Hema, who loves lord Ganesha.


Creative in a lot of things herself, Hema is a super-busy mom to a beautiful one year old, who still manages to find time for craft ideas.


The deep blue box you see below her altar shelf, is not actually a box. It is a rangoli coaster that she uses to decorate the altar.

Worship has to come from the heart more than outside it, which is why one needs to set aside the conventional love for big size. In Mumbai, it can be a challenge, with the entire city and its outer cities turning the streets into Ganpati party zones, and large idols making the atmosphere euphoric during the nine days.

Still, a friend Sridevi Appari managed to do just that. All she needed was about half a kilogram of turmeric and water.


The result is divine, earthy and attractive at the same time.


Notice how a couple of vases with flowers add to the profusion of colour even more. And how the oleander strings sit comfortably on Ganesha and the kalash.

Sridevi's mom had such a Ganesha too, in a larger size. And needless to say, their steadfastness to stay green inspired TV coverage by a Mumbai TV channel. Here is how her Ganesha looked before the pooja.


Turmeric was what I used too, in my own personal tradition, of not buying the festival idol. I did not indulge in creativity to make the idol - just stuck to making the turmeric cone that is used in other festivals for a token Ganesha pooja, with some besan (chickpea flour).


Notice the little turmeric hill on the beetle leaf in this plate. A packet of flowers and some grass from the garden outside. And I was comfortable to go.


Those yellow circles with kumkum to decorate them, are symbolic of the lord's clothes. The bead-like cotton encircling is to symbolise his sacred thread.

I did manage to make a super quickie umbrella.


This one, is made with the end of a plastic garlic net bag, a bamboo skewer, some dried bamboo plant leaves, and rice in a brass crush bowl. Another flower to top it. The umbrella is integral to many households where people make it using cardboard. As the story goes, after all the war, Ganesha went for a stroll on his mouse, belly full and an umbrella on hand. And the moon laughed at him.

The rice went into our bellies later, while the leaves went back to soil. As for the net, it hangs around home for another use, perhaps in some other craft project.

I do not have a better picture of this, but it looked a lot better during the worship.


A chunk of my extended family still sticks to picking up paint-less Ganeshas a day or two before the festival. My own experience in Mumbai when I lived there, was their complete absence in the sea of painted idols.

An option when you get an idol that is not painted, is to add some decor element to it yourself.

My schoolmate Sujatha Ratnala and her family did just that. They got their idol through an NGO that makes, sells and teaches to make eco-friendly idols - To Make A Difference.


``They charge less than 50 per cent of the market rate. And they deliver it at the doorstep, just to save lakes,'' says Sujatha, who has been picking up these idols from them for the last four years. This year, nine of her neighbours got them too.

As for giving the deity a personal touch, she got her son to paint it a little.


The family used muggu rai - or the chalk used in millions of Indian homes for home rangolis. They dissolved it in water and the boy used a paint brush to decorate the idol.

Other embellishments around home came in handy.


``The crown, we had from earlier festivals. And the cloth too. For the forehead, we used a beaded rakhi,'' says Sujatha. As such, such crowns can be found in many religious shops.

A small piece of white cloth that makes for the dhoti, is a piece of Kerala dhoti tied using a string. She cut the cloth to the size of handkerchief, and tucked the pieces in pleats to the string neatly.


The highest form of worship is when you offer yourself to God, selflessly and in spirit. I remember a beautiful Hindi poem at school, that talked of offering to God, the flowers on trees, as they were, without plucking them, and water from the oceans and rivers, without taking from them.

Being aware of the environmental hazards of toxic paints going into the water bodies, and defying societal frenzy by staying true to your heart are essential to one of our most important festivals.

It is heartening, going by the rising number of hits that the DIY Ganesha posts on this blog get each year, that as a population we have been taking interest in going green for worship. Wish we did that for every festival, every day worship, and every activity.

--

Pictures courtesy: respective owners or devotees -- Hema Sampath for the homemade clay Ganesha, Sridevi Appari for the turmeric Ganesha, Radhika M B for the tiny turmeric cone Ganesha, and Sujatha Ratnala for the NGO sell eco-friendly Ganesha.

Pictures have been used with permission from respective owners.

Any further use of the pictures requires permission from Imprints Handmade, and needs to attribute the use of these pictures, to Imprints Handmade. Copyrights for the pictures rest with the owners.

Friday, September 25

An O-ring on my ear : Thrifty idea to upcycle hardware joint sealers

Jewellery crafters across the world have a common problem. No amount of beads and tools can ever be enough.

If you are a crafter with a million ideas, expenses towards beads and findings can hit the roof. How about getting that zing on the style quotient with less or no cost at all?

All it takes is a trip to the neighbourhood hardware store. Ask for o-rings.

Wondering what they are? O-rings are really miniature gaskets, donut shaped, and used to fasten joints for various hardware projects. If you are aware of the pressure cooker gaskets, just imagine tiny versions of it They come in various sizes and a few colours. Although they are integral to the hardware DIY and tools world, o-rings have found favour with thousands of crafters across the world.

They have the recyclable star, can come in not just umpteen sizes, but a bunch of materials - plastic, neoprene, rubber and the like. Plus, they are dirt cheap. I have not checked their prices in India. But just walk up to one of these stores and check out for yourself.

I got lucky with a pack of silicone o-rings. And raced to get my jewellery making pliers.

This simple project needs you to get a hang of turning the nose pliers and flat-end pliers, and the cutters. Once done with a bit of practice, this one takes just a few minutes.


Here is what you need:


-- Fish hooks among jewellery/jewelry findings

-- jump rings

-- o-rings of the desired size, in this case I made do with o-rings of 3/4th inch diameter

  (material of o-ring here is silicone)

-- another size rings, preferrably smaller, from a jewellery finding stash or store (perhaps the craft store actually sold me o-rings in plastic)


Most importantly, jewellery/jewelry pliers -- nose plier, flat nose plier and cutter


Simple steps...


Fix the jump ring to the o-ring, and next on, attach the smaller rings to these using another jump ring. If the jump ring is flexible enough, you could use your fingers to do the fixing.


After this, fix the eye-end of the fish hook to the smaller ring, using another jump ring obviously.


You will need a plier for this. as the eye-end of the hook is tiny to handle.


Your new pair of earrings is ready.

Another option, is to use eye-pin headpins among jewellery findings. If you do, make sure that the `eye' of these eye-pings is large enough to hold the thickness of the o-rings.

Otherwise, you may use jump-rings to do the trick.

I have tried this second pair using two beads that were tucked away in my beads box. 

So you need a pair of beads, and eye pins.


Insert the bead into the eye pin, and bend the part of the eye-pin just above the bead in such a way that you can make a loop.


Roll the hanging end of this loop over the pin's part exactly above the bead, to hold the bead firmly.


Note here, that once done, you will have the eye pin's eye below the bead, the `eye' formed above it, and the loop available when you insert a jump-ring to the `eye' below the bead. To this jump ring, add the o-ring. And fix a fish hook, to the loop on the other side of the bead.


Your new pair of earrings is ready. You can give it a shot, using o-rings from a hardware kit, in different sizes. Wear these as work jewellery, or gift them away. Pick up other colours of o-rings, and start off your own little projects. Mail in about your effort.

Tips: 

-- deal carefully with the pliers and cutters

-- if you need to cut off extra part of the eye-pin after looping over the bead, make sure you use the pliers to blunt the cut edge

-- if you do not want to use jump rings for the first pair, you can attach the two with super glue

-- when you use beads, use them above the ring rather than below the ring, because silicone rings are somewhat elastic...they may bend or assume a different shape if burdened with weight


Pictures Courtesy: Radhika M B

For permissions to use, write to: radicreative@gmail.com