Showing posts with label green your life. Show all posts

Tuesday, April 11

Nursery mobile with cardboard roll, DIY

One of the trends that has made me gape in awe is the sheer magnitude of products for babies these days. As a new mom wanting to give my baby the best, I am obviously tempted to buy more for the bundle of joy. 

But let's not forget that for every plastic toy we collect in the name of a child's learning and play, we add that much more to the earth's toxin burden. Sometimes these toys are a mere phase, leaving you wondering what to do with them. Nursery mobiles are a fad with parents. From colourful to sophisticated, they are a must for any nursery with a baby and crib.

For a change, I decided to make my own nursery mobile. I am not so satisfied with the resulting piece, but it's given me loads of confidence to make more of the kind and gift to babies.

It may sound a surprise, but the project really did not cost me a fortune. I had to make use of household craft stash.

What I used:

-- a pair of scissors

-- a duct tape ring leftover after using the tape up


-- embroidery skein of the same colour as the wrapping paper or ribbon or plarn to cover the duct tape ring
 (I used parrot green colour thread)


-- a needle and white thread

-- cloth flowers of accented shades

-- punches - circle and flower type


-- patterned paper, sequins, some household cardboard if need be

-- craft glue

-- soda can pull-tab...always keep these handy, you never know what they can be useful for


I began by wrapping the cardboard roll with plarn (plastic yarn that I made before with plastic shopping bags). You can try wrapping it with satin ribbon or some patterned paper. If you plan to glue up decorative paper though, make sure you have sufficient glue for it.


I let its end stay for a while, lest I would need it later. Now came the need for my embroidery skein. A white or jute twine could be your alternates here.

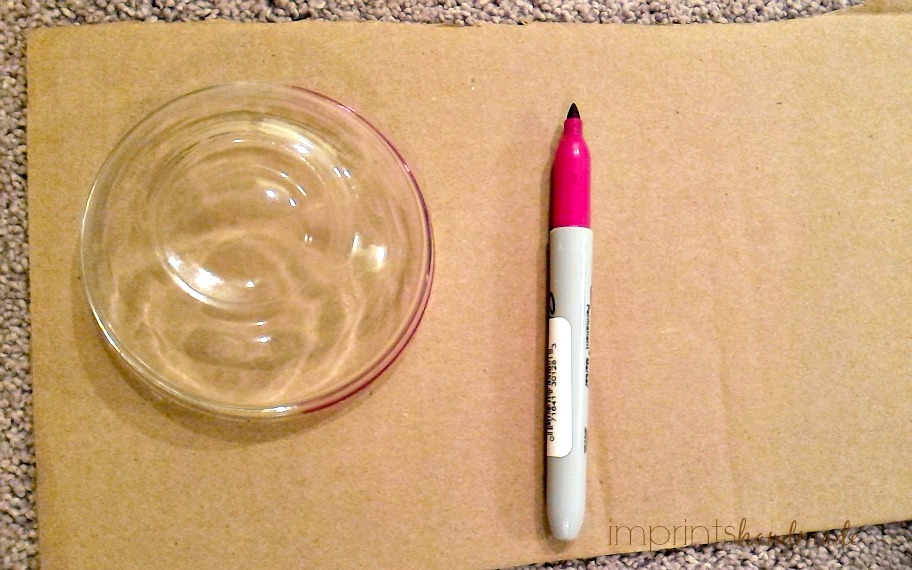
I started off by leaving some thread, about half a feet, and fixing sequins on it. To fix sequins, I picked up a pair, squeezed glue on to one of them, placed the thread over it to run through its center, and stuck on it another sequin of the same shape and size.


I used the craft punches to cut out circles and flowers from the patterned paper. Some flower shapes I had in stash earlier from mail trash. I left space of a few inches on the thread, and glued together another pair of circles from the patterned paper, and some flower shaped punched pieces from magazine recycle.


After this it was about tying the thread on to the cardboard ring. Try leaving irregular spaces, and do not stick to the same length each time you cut a piece of the embroidery skein. You can fix about five such pieces on to the roll. Add some pieces of ribbon and maybe knot it up on the ring to hang down alongside the threads.

I used long pieces of ribbon to tie through the roll for a handle on top of the mobile, and inserted the bunch of four lines of the ribbon into the soda can pull tab for buckling up.


Your nursery mobile is ready. This is a rather simple one. I hope to improvise though future projects. I am sure my baby will love this. The piece took some time to make, and was taxing, considering how busy the little angel keeps me these days. But it was worth the effort. I am waiting to see the reaction on her face when I hang it near her bed.


For re-use, write to: radiscribe@gmail.com

Tuesday, October 25

Wall decor piece from lid of formula tin: How to


It's festival time everywhere, with the brilliant golden hues on trees everywhere in my part of the world, prompting Fall tourism and thousands of pictures, and the excitement before Diwali, the ultimate festival of lights. 

A recent trip to the local craft store prompted me to pick up a foam stamp with a lamp, almost on a whim. I am not usually someone who likes buying anything foam. But this one I picked up confident that it will help repurpose something back home. And it did. We are into using baby formula tins in plenty these days. And each tin has a pull tab lid that has helped preserve the powder in it. But what to do after pulling it out? You guessed it right. The foam sticker and the pull tab lid I used for the next project.

What you need for this little decor project:

-- pull-tab lid of a formula tin, or a soup can, roughly bigger than a CD\


-- 3-D outliners or 3-D glitter glue of two colours to match the foam stamp


-- a foam stamp, or used 3-D sticker


-- multi-surface craft glue of industrial grade, or a hot glue gun (I used a glue gun)


-- a pair of scissors (optional)


-- old newsprint or trashable paper, or tissue paper 


The pull tab lid I had, was bending awkward when I pulled the tab too hard, causing the lid to lose shape at times. I normally pull out the tab when I use soft drink cans. But this I let be.

It would be good to keep the foam stamp, or other decor stickers that you want on the lid, to get an idea of how it may look in advance.


You need to begin by cleaning the surface of the tin lid with a clean cloth. I decided to embellish the edge of this circle plate which was rather sharp. Using a glitter outliner can take the sharpness off a little, or simply keep you from putting your fingers directly there. For this reason, the project is certainly not for young children.


Squeeze the glitter glue or outliner over the edge of the circle slowly, by moving the embellished part of the plate away after you are done each time.

Such glue takes some patience to work with, as it can get smudgy, which is why you need a tissue paper or rag cloth handy to smear off the smudged tip on to it every now and then. Sometimes, a single squeeze-line may not be enough, and so you squeeze another line of the glue after a while.

Let dry.

The next step, is to use the hot glue gun or multi-surface glue on the center of this disc, and quickly fix the foam stamp or any other sticker. When using the glue gun, do not let the glue set for more than a few seconds. It is why I chose not to click a picture of the glued surface too.


Pull out any residual glue that strings up.


I would have left the piece the way it was, but for the sudden need to bedazzle it.

And so out came another colour of glitter glue.

A few dots to surround the lamp theme stamp with crimson outliner, and some lines with the black colour.


The decor piece is ready. Enjoy the festival of lights, and stay away from polluting fireworks. Try sticking to eco-friendly celebrations.

Tuesday, August 9

Make a mini circle weaving loom for kids

A million ways exist to keep kids engaged, and yet nothing you do can be enough. Tragedy is when you spend hard earned hundreds on toys, only to see your child forget it after a day of play.

You can make room for inexpensive activities around home instead. I tried making a circular weaving loom, something you can try with kids on a lazy afternoon.
B
Unlike the regular looms with warp and weft, a circular loom is a little different from the rectangular looms that are universal, and get used by DIYers for a range of pieces such as rag rugs, doormats, plarn projects, etc.

You need spokes, like in a wheel, drawn on the base.

Materials you need for this project:

-- a piece of corrugated cardboard

-- a marker or pencil

-- a ruler, one foot long

-- a pair of scissors

-- a spherical container such as a bowl, made of sturdy material, from your kitchen

-- yarn - chunky ideally. I used jute and wool. You can choose a couple of colours or stick to jute

-- a tapestry needle that is blunt (kids' safety) - optional


Draw a circle using the kitchen cup to guide.


Cut this circle.


Using a ruler, gauge the centre approximately and draw a bunch of lines criss crossing through the center, forming spokes for the circle.

Get the pair of scissors out again, and make small slits on the circumferene of the piece, towards the centre. These slits must be on the spokes.

Knot one end of a twine between the slits of this circle.

And run the thread along the spokes by using the space between the spokes on the rear side of this circle.


Once done with most of the spokes, knot its ends. An get the rest of the yarn out.

The looping of the spokes bit, you can do with your child. The weaving part is definitely the teachable part, where you show how the thread can go over and under the spoke-yarn and form a textured piece. You can optionally use a tapestry needle and demonstrate.

In effect, get your child to start weaving. For fun sake, get another colour yarn, or a different texture yarn to experiment with the thickness.


Either glue it towards the end, or knot the thread.

Optionally, cut of the warp from the slits and knot it up, or use this disc as a little wall hanging instead. Carry it to work, or keep at the kid's desk.

To hang it, cut a piece of wool or yarn and loop through one of the pieces at the slit, and knot it.


Try this in different colours. It's something kids will love, and you will not have to fret over costs.


Pictures courtesy: Radhika M B

For permissions, write to: radicreative@gmail.com

Tuesday, August 2

No sew tote from T Shirt for my stuff toys

No-sew T-Shirt totes tutorials have taken the internet by storm of late. Every other day, a new video turns up on social media. For the methodical crafter that I am, these pieces of quickie bag making from old Tees were a put off. But out of curiosity I decided to pull out my husband's old T-shirt and give the effort a shot.

Often the tutorials for no-sew bags are with small sized T-shirts. The one I used was a baggy type garment that would have landed in the old-clothes dump box, but for my experiment.

Since the internet is so full of the tutorials, I will list out tips that may be helpful, based on my project that lasted about an hour and half.

All you need for this project, is

-- and old T-shirt and a pair of scissors

When choosing a T-shirt, keep in mind the purpose of your end product, the bag. If you plan to step out of home, a decent looking one could help.

Else, reach out for those ready-to-trash ones.

Here is a picture of the Tee I used.

The colour was originally a shade of military green.

But it turned into greenish beige with over-use.

Mark out how much you want to cut at the bottom and fold the Tee at its lower end by about two inches or more if you deem fit.

Keep in mind, that you will need to cut off the hands. You can visualize the length of the hands to get an idea how much needs to be cut.


Run the scissors along the fold and cut it.


Now you may fold the T-shirt again, by an inch or two, and cut this part into several strips that start from the upper end side of the T-shirt and hang at its bottom.


Cut off the garment's sleeves and alongside the neck.


Here is where a tip of two will come in handy for you. Gauge the length of the sleeves and the neck. This T-shirt had a round neck, and had a dramatic difference in height, compared to the length or height of the sleeves. I had to trim after initial cutting. This piece of upper garment can alternatively be used as a layer that you pull over on your body in winter. It works as a bust piece that can be hidden away.

The shearing may not be as smooth as the videos online show. It is your first attempt. Do not beat yourself up. It is all about trimming and patience.


Pick one strip from a corner, and another from the other layer, and knot the two strips up. I used two knots to keep it sturdy.


Continue knotting. Tip: Keep in mind the quality of your fabric. I cut the strips two thin. A little extra width for each strip does no harm.

Knotting takes long. Load yourself with patience. Plus, it is possible that a piece or two actually breaks when you try to knot it.

Once you are done with the knotting, the bag is ready. If you want to invert it, go ahead. I did not. I was only glad to stash in my stuffed toys, toys that I keep ready for any visiting toddler to play with.


Enjoy using the tote.

It is a teen craft. And you can either use it, or gift it away. My suggestion, keep a bunch of these ready and stash in your hand-bag. You can use them for groceries. Or give away when you spot someone in need of it. Or simply make a whole cartload of them for charity.


Pictures courtesy: Radhika M B

For permissions, write to: radicreative@gmail.com


Monday, July 18

Bottle caps for a painting palette DIY

Ever tried to pacify a toddler with toys galore? Or paper and paints if the child is creative? Chances are that you ended up paying through your nose to keep the little one engaged for all of half an hour.

It's amazing how you can reinvent household discard-ables to keep your little one occupied before you go anywhere near the trash can.

Fingerpaints, watercolours and the likes are a rage with kids these days. How they love to smudge themselves with colours! As a child, I had such wishes too, that I get a room full of paper and run with paint on my feet, and hands. No reprimanding teachers, no worry about spoiling my uniform.

Teaching the child to stick to pouring paint into a palette is a big task. And you can make your own palette! Show your kid some variety. Use household plastic lids. You don't need scissors. You do not need needles. Nothing.

Just some multi-surface glue or super adhesive, and maybe some sandpaper, besides of course the lids of bottle caps of different sizes.

I used the lid of a box that usually contains dosa batter for this activity. Its diameter is approximately six inches. You can find such plastic boxes in stores that sell packaged curd, batter or other foods.


Scout around home for smaller size lids of various bottles. Wash them all thorough, and get to work.

You need:

- a large lid for the base of the palette

- glue (multi-surface) or super glue

- smaller size bottle caps of an inch or less in diameter

- sanding paper (optional)

- tissue paper (just in case you spill glue)


If you are using multi-surface glue, sand the upper surface of the caps so that the glue sticks. If you use super glue you do not need to do it. Arrange the caps on the large lid to get an idea of, how many may fit on it.

Glue on.


And stick the cap on to the large lid.


Continue this with the other caps.


When you stick, chances are that the glue will overflow. Do not fret.


The palette is ready, not to use, but to dry. My piece took a whole day to set in and dry. You may get luckier. Buoyed by the results on this, I tried this with the measuring caps of cough syrup bottles over one half of a styrofoam or thermocol clamshell container.

Instead of multi-surface glue, I used super glue.

\And let it dry.

It was tricky, thanks to the ridges on the container's base, but I pressed the surfaces hard.


Meanwhile, the former piece dried.


It is ideal for temporary use. And enough to catch a kid's attention for a while.


Pictures courtesy: Radhika M B

For permissions ot reuse, write to: radicreative@gmail.com