Tuesday, October 25

Wall decor piece from lid of formula tin: How to


It's festival time everywhere, with the brilliant golden hues on trees everywhere in my part of the world, prompting Fall tourism and thousands of pictures, and the excitement before Diwali, the ultimate festival of lights. 

A recent trip to the local craft store prompted me to pick up a foam stamp with a lamp, almost on a whim. I am not usually someone who likes buying anything foam. But this one I picked up confident that it will help repurpose something back home. And it did. We are into using baby formula tins in plenty these days. And each tin has a pull tab lid that has helped preserve the powder in it. But what to do after pulling it out? You guessed it right. The foam sticker and the pull tab lid I used for the next project.

What you need for this little decor project:

-- pull-tab lid of a formula tin, or a soup can, roughly bigger than a CD\


-- 3-D outliners or 3-D glitter glue of two colours to match the foam stamp


-- a foam stamp, or used 3-D sticker


-- multi-surface craft glue of industrial grade, or a hot glue gun (I used a glue gun)


-- a pair of scissors (optional)


-- old newsprint or trashable paper, or tissue paper 


The pull tab lid I had, was bending awkward when I pulled the tab too hard, causing the lid to lose shape at times. I normally pull out the tab when I use soft drink cans. But this I let be.

It would be good to keep the foam stamp, or other decor stickers that you want on the lid, to get an idea of how it may look in advance.


You need to begin by cleaning the surface of the tin lid with a clean cloth. I decided to embellish the edge of this circle plate which was rather sharp. Using a glitter outliner can take the sharpness off a little, or simply keep you from putting your fingers directly there. For this reason, the project is certainly not for young children.


Squeeze the glitter glue or outliner over the edge of the circle slowly, by moving the embellished part of the plate away after you are done each time.

Such glue takes some patience to work with, as it can get smudgy, which is why you need a tissue paper or rag cloth handy to smear off the smudged tip on to it every now and then. Sometimes, a single squeeze-line may not be enough, and so you squeeze another line of the glue after a while.

Let dry.

The next step, is to use the hot glue gun or multi-surface glue on the center of this disc, and quickly fix the foam stamp or any other sticker. When using the glue gun, do not let the glue set for more than a few seconds. It is why I chose not to click a picture of the glued surface too.


Pull out any residual glue that strings up.


I would have left the piece the way it was, but for the sudden need to bedazzle it.

And so out came another colour of glitter glue.

A few dots to surround the lamp theme stamp with crimson outliner, and some lines with the black colour.


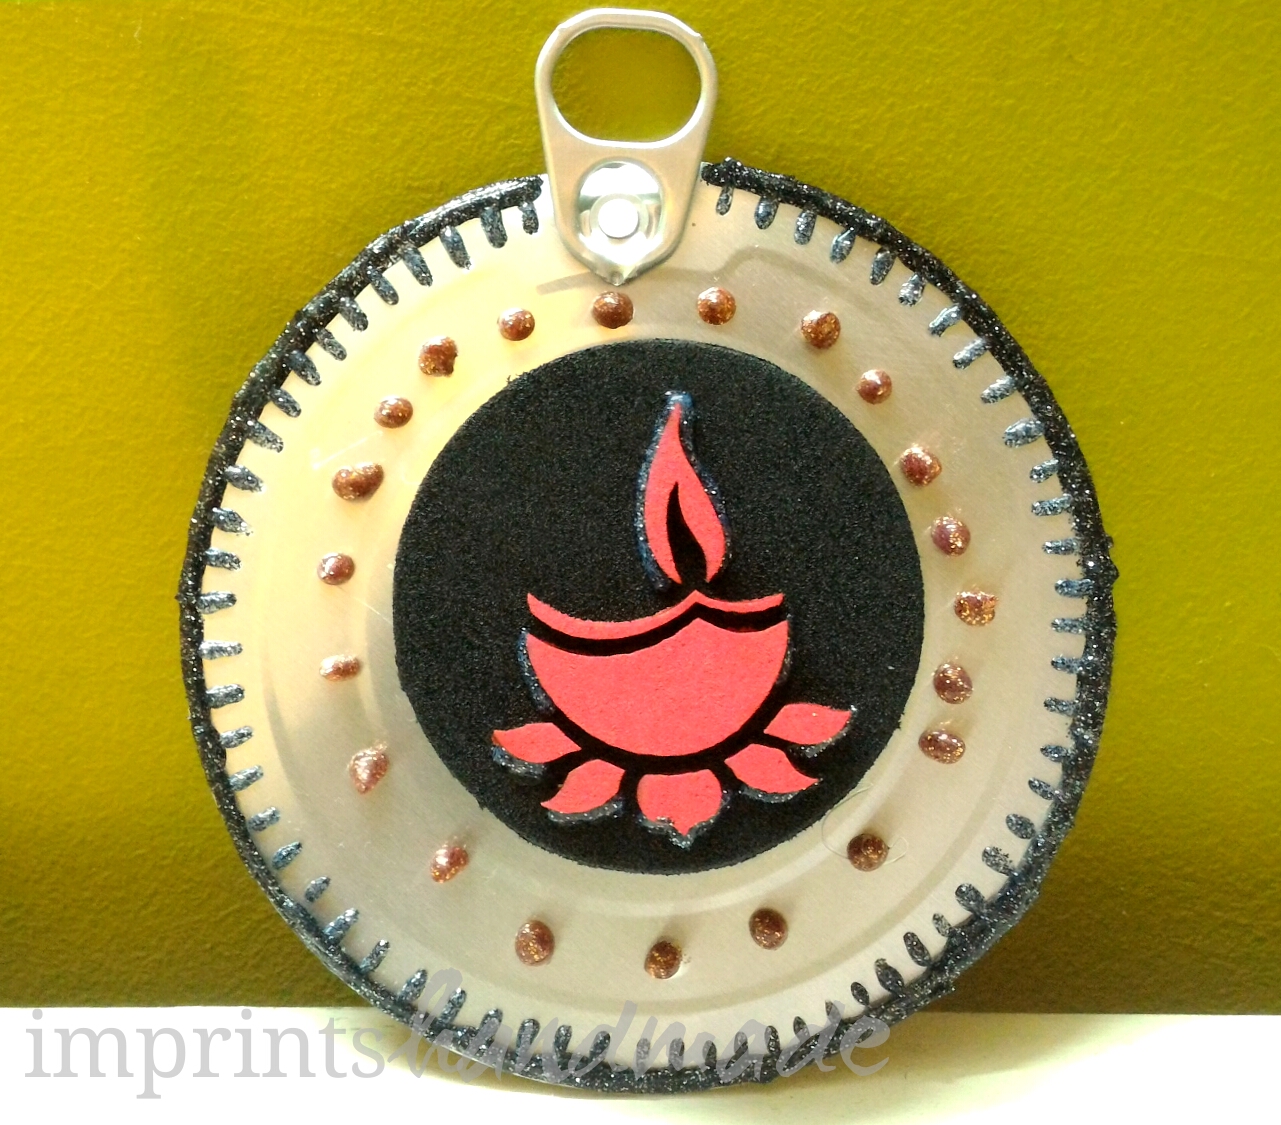
The decor piece is ready. Enjoy the festival of lights, and stay away from polluting fireworks. Try sticking to eco-friendly celebrations.

Sunday, October 16

Super simple polymer clay earring studs DIY

One of the reasons that crafting enthusiasts do not venture into making baked jewelry/jewellery, is the fear of lacking skills. It is a valid fear. But all it takes is that one small project, that helps overcome it. Today's polymer clay jewelry making experts are yesterday's novices.

Smudgy Trove's dashing entrepreneur Sankgetha Sripathy is someone who can dole out exquisite jewelry designs, exquisite and simple, ethnic and chic, with ease. Her Imprints Handmade early tutorial on polymer clay jhumkas continues to draw visits in thousands. If you can lay hands on an OTG oven, or borrow its use from a friend, you can start a project.

For those taking baby steps in clay jewelry, she has quickly put together easy peasy instructions to make a pair of polymer clay stud earrings.

Here are the materials you need:

- jewelry/jewellery pliers

- one mound of polymer clay the size of a plum, a dark colour

- one ball of polymer clay, in light colour, about half the size of the other ball

- clay blade

- tapestry needle, or toothpick, or large needle

- stud-backs and stud screws

- sequins

- anything that can cut a disc, like polymer clay cutters with disc cutters

Start by making two balls of equal size from the dark sized polymer ball between your palms.

The smaller ball needs to be broken and kneaded into several tiny balls using your fingers.

Make discs out of the dark balls and use the tiny balls to make drop or oval shapes of similar size. Fix the drops on the discs to form a design, to resemble a flower.

 Add a sequin to form the flower center.
Use the tapestry needle. Run it gently between these drop shaped fixes to make them look like petals.
Bake these diskettes as per instructions on the clay packet. Sankgetha used Premo clay, a popular choice for beginners.

Use industrial grade glue to fix the stud-backs to the rears of these designed diskettes.
Let the pieces dry. And then use the stud screws on them.

Your super simple pair of earrings with polymer clay are ready.


Wear them to work or keep aside for an occasion.

Pics courtesy: Sankgetha Sripathy

For reuse permissions, write to: radicreative@gmail.com

Monday, October 3

Make your own cardboard stencils

Stencilling as an art has gained momentum in the recent years. The creative form that bore the burden of disregard as an uninteresting one, is today the toast of interior decorators.
At home you do not have to invest on expensive damask or chevron stencils if you want them on smaller objects that get get a new lease of look. Grab the cardboard of household boxes and get started. Go for easy to make designs. Intricate cuts are for experts. And think of how little objects can be used.

You will need:

- household products cardboard, plain and pieces with packing slits

- a pair of scissors

- marking pen

- used 3 D or thick stickers or collants

- pen knife or craft knife

- small hole punch

- bangle

- cardboard strip of dark colour

- craft paper or construction paper of light colour

- some brush pens, or stamping pad with paint sponge

- colour pens or pastels


For my little project, I pulled out a flower shaped sticker from my stash of used 3D stickers and outlined it on a piece of product cardboard.

Next on, it was about carefully cutting the shape off with a craft knife. I used this on a sheet with brush pens to colour away.

You can also use paper punches to create some stencil designs.

I used a small hole punch on a piece of cardboard, to create random small holes.
I the placed this cardboard on a royal or navy blue strip of cardboard to create a design for a bookmark.


It was stars, and a crescent moon. I used a bangle to get the shape of the moon right. And dots with a pen to create a night sky.

If you get cardboard with pre-punched shapes to hold a product, you can utilize it to make other designs. 
The piece I had was useful.

I simply coloured inside it's top slit shaped like a plate with a bun, randomly over paper.

And added some stars. They look like flying spaceships. If I had added folk motifs, the design would get a rural touch.

For the festival season, you can wrap gifts in these papers or reach a kid to experiment with designs. Find everyday objects to try.

Pictures by Radhika M B

Write to radicreative@gmail.com