Wednesday, September 26

Postal flavours: Bookmarks with mail trash

We may have moved on from hand-written mail to e-mail world over. But that does not stop your mail-box from filling up.

My mailbox often gets full with coupon mail of stores I can rarely visit, given my no-car-no-life status out here in New Jersey. The other mail is from the electricity office, cable TV office, insurance and banks.

A lot of mail belongs to earlier tenants too, who we cannot go looking for.

Mail covers or postal envelopes in the US have patterns on their inside, something I love. I decided to experiment with these patterned paper pieces for my bookmarks.

The picture below is a sample of mail envelopes, basics needed for the bookmarks such as glue, a pair of scissors, mail envelopes, ruler and pre-punched shapes. You also need a paper punch - regular. And a small hole punch if you like.

Using a paper-trimmer, and corner rounders besides


I used a type-writer rubber stamp, and `a story begins' stamp which I had been looking for, a long time and found at Michaels during the Fall sales kick-off recently.


Dabbing some distress ink from a Distress ink stamp pad helped with the vintage look. Some olive green string with a wooden bead, and it is done.

Not to forget, you need a cardboard piece to firm up the patterned paper. I used cardboard from a pizza carton.

Here are the other pieces.

Since I was only experimenting, did not want to stick to a particular style. The red or crimson patterned paper bookmarks in the picture are actually courtesy mail from Target. Postal envelopes mostly have blue patterns or shades of grey-black. This was an exception. And my delight.


The `Live life' and `Hope' rangolis, I had experimented a couple of years back...not so happy with their result here. But I know how to make future sets better. The stamped words in the third one here read `Once in a lifetime you meet something who changes Everything'...so true! The white flowers are pre-punched from mail envelopes.


Here they are, a mish-mash of tinies and longer ones.

For the tinies, the sticker sheets above came in handy. If you look at the bookmark on extreme left, it is again a cut out of a mail cover. I still cannot figure out if it is pre-paid stamping by companies or bar-code printed. I have simply stuck the piece on another piece of cardboard, and a sticker rose to embellish it.

The paper clip bookmark was made with left-over mail paper and pre-punched flowers stuck on a paperclip.


Here is the rear side of some of these bookmarks....done rather casually. A doodle here, a punch-shape there...


Have a lot of mail around? Go ahead, try something. If you have kids at school, get them to try something new. And do mail me the pictures ;).


Photos: M Radhika
Permission for re-use is a must.


Monday, September 24

Gift Wrapping got innovative : Part Three Li'l Somethings

When you gift a pair of earrings to a friend, it's always a box - ideally a cutie red one, with that velvet feel, that you fall back on.

What if you don't have a box? The ever-so creative Lalitha Menon shows us how. I have all the reason to name her gift wrapping ideas - Back to Nature!

See on and read on:


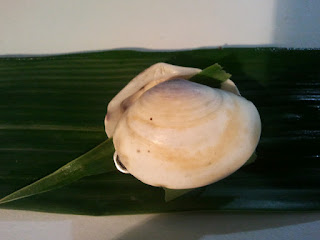
We would hardly think two shells from the beach and a bit of banana leaf would do it, wouldn't we? Actually, the leaves in question here are bamboo leaves. Lalitha picked them up from a Goan beach.  And here is how she wrapped them:


A ribbon-bow like fold...and some tape to stick it up. She also used toothpicks to fasten.

She says she used glass-paper to cover the little gift further. Glass paper is paper that has a layer of pulverised glass, according to answers.com. But it is also another name for sandpaper. 


Satin ribbons - white and violet, finish the touching up.

Here is what she gifted her new friends recently.


The gorgeous looking shiny paper used here is actually re-purposed invitations. And a piece of Kerala dhoti to wrap around. As for what was in the wrap, the picture below shows it, and the beaming faces of her friends tell you her effort did not go in vain.

The gifts are leather wallets in bright colours and lovely designs!

For the next set of gifts, here is the picture.

She did this ensemble for her best friend. The card standing with her words and balloony hearts stuck with ribbons, is actually another re-purposed wedding cards that were discarded.  In the Fabindia brown sachet is a handmade soap bar. She used hand-made paper bought from a mall near her home for the heart-balloons.

To the extreme left in this picture is a teak-leaf wrap tied up in satin ribbon. The gift inside, is a little jar of payasam or sweet porridge that Lalitha made. She wrapped a few white lilies in teak leaves and satin-ribboned them on an end.


The other gifts are glass bangles, and some sandalwood cream from Khadi. I am in no doubt at all, that her best friend loved them all.

Way to go Lalitha, and looking for more from your creative table!

Pictures Courtesy: Lalitha Menon

Copyrights for pictures rest with Lalitha. Permission for use of pictures and content is a must.


Thursday, September 20

Ganesha on my plate

For many, the grand Ganesha Chaturthi has come and gone. Suburbs of Mumbai are however alive with the long festivities during rains.

Love for eco-friendly Ganesha idols has only grown stronger in me over the years. And attempts by those around me to make their idols at home have infused some hope in me, despite still cringing at the sight of those beach-washed broken hands and legs of Ganesha over sea-shores.

I wish the business class, read idol-sellers, makers and anyone commercialising the festival must realise that the true essence of this festival is about worshipping nature. And in promoting alternative methods to the over-abused plaster-of-paris and chemical paint idols, they are only securing long term livelihoods - those of their children too.

Am pasting below pictures of home-made efforts by two people I know.

Pavani Prasad who lives in Luxembourg and also happens to be my cousin, tried this at home. Here is the picture of the final result.

 And the steps towards it:


She used baking soda and corn flour to make this in 1:2 proportion. The tiny size of the Lord is so much prettier than our obsession with large idols. She used some food colour for the pale yellow finish.


Does that not look simple? And then, how can one miss the mouse!


She touched up the idol with nail paint, which I would not exactly advocate, but worth the effort anyways.


Does he not look cute with the tikka or tilakam? Here is a picture after the pooja.


A pooja table can be this small and still beautiful. These tea-lights only add grandeur to the spread.

Here is another effort by friend Dipti Nair who makes her own idol, year after year.


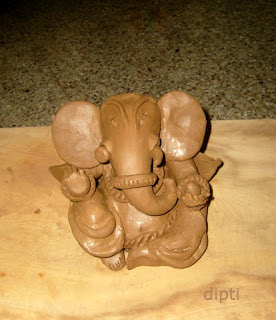
Here is her Ganesha from year 2009. Doesn't he look lovely! The pagdi or turban made with such care! Not to forget the upper garment and jewellery. The following pictures, are her step-by-step effort for the 2010 festival.


 This picture makes it look the simplest task ever. Flatten clay and shape for the ears, roll it lovingly into conical shapes for the trunk and legs, and hands...


And finally,


This year, her Ganesha got bigger!


Look at the magic a dash of turmeric (pasupu, or haldi) can do to an idol! Not a dab of paint here! Yet, he looks so beautiful and earthy!

Now, for my own attempts. I have in the past stuck to worshipping an idol I received as gift, when in Pune. One of the famous Ganesh Mandalis gave the gift, and it has become an integral part of my annual worship. 

Here are pictures from last year's pooja:


Turmeric and atta (wheat flour) on a beetel leaf. A turmeric cone is all that one needs to make pasupu vighneswarudu, otherwise called manjal vinayagar or haldi ganeshji.

The terracotta Ganesha on the right rear was also a gift. 


This time, in the confines of my home at New Jersey, I have not had access to either flowers or clay, or beetel leaves.

Inspired by www.eco-exist.com (read my earlier post here), I decided to make do with whatever I had. In fact, I had to battle in my head whether to go ahead with the pooja after some recent setbacks. But decided that worship without celebration is just fine.

Here it is:


Rice spread out on the plate, some rice flour mixed in turmeric for the crown and ear contours, rice flour for the tusks, pumpkin seeds for eyes, and kumkum for the tilakam.

Grass from the front yard came in handy. And so did pebbles that I had painted with rangolis last week.


I drew inspiration for these rangolis and toranam from Rang Decor, my favourite decor blog. I plan to use these pebbles that I collected from Raritan beach, for home decor. Pasted below is the picture that captivated me in an instant and has stayed in my heart ever since, from Rang Decor.


And here is the post for reference. Thank you Rang Decor!


These are pictures of the Lord after dark. This time, I could not manage a procedural event unlike before, when I would read up the books or play the online pooja streaming websites. But the whole purpose of the day was fulfilled because we worshipped with what we had around.

Do read Rang Decor blog too, for the latest Ganesha post.

Pictures Courtesy: Pavani Prasad, Dipti Nair, Radhika, Ramya M
All pictures are water-marked.


Copyrights for these pictures rest with the photographers concerned.

Pictures from the Rang Decor blog - copyrights rest with the Archana Srinivas.

Friday, September 14

Re-purpose, salvage, don't throw it away

What exactly would you do if an item around home broke? Not to a million pieces, but a little? Would you still throw it away?

A little patience and some creativity can help re-purpose or repair the item, if not complete restore it. The net is full of ideas to repurpose used and broken items.

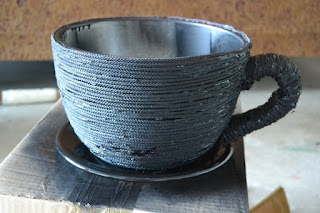
Here, am pasting pictures from Vidya Nair's lovely post about how she repurposed, rather salvaged  a broken tea-cup planter she had bought from Walmart, for the same purpose.


Incessant rains ruined the plants and planter.


Here is what she did:


She hot-glued the planter with this cord, and spray painted it with grey paint.  Not happy with the look, she painted it again, this time with orange.


And the planter was ready for use.


Her own experience with the whole project, is available in her wonderful website: www.whatsurhomestory.com

Picture Courtesy: Vidya Nair
For any re-use of pictures, copyrights rest with Vidya Nair.
And for use of content here: write to me

Wednesday, September 12

Gift wrapping just got innovative : Second Part, Leaf and fabric wonders

For those of you who loved the post about Lalitha Menon's creative gift wrapping that is earth friendly too, here is more from her loving heart, thinking head and quicky hands.

In my earlier post about her work, you saw how she used banana leaves, cinnamon and Inja tree bark to wrap her simple yet thoughtful gifts.

Here are pictures from her recent gifting:


The picture is self explanatory. A glass jar of payasam or sweet porridge made with vermicelli. A piece of banana leaf to seal the jar mouth better and the lid to top. With absolutely no need of any other gift bag or wrapping paper, she fastened a satin ribbon around the lid. Whew! Economical yet creative! And no hiding of the yummy payasam!

Now for the next one:


It's an exquisite soap bar from Fabindia. Guess what's its wrapping paper! A piece of a Kerala dhoti. Here is how she wrapped it.


She added, rather strung wooden beads in for some more decor.

You can imagine a hundred things that could be in the pictures below.

The huge leaf in question is a teak tree leaf. Cannot imagine the size, is it not? Just google ` teak tree leaf'. I was surprised by the amazing size these leaves could grow to.


Here though, the leaves available in her garden have been used to make a lovely gift wrap for, a shirt. Lalitha pinned their edges carefully with coconut sticks which are common in Kerala too. She then wrapped its middle with the piece of a Kanchipuram saree. Hanging roots from the teak tree served as twine to tie the package up. But what amazed me was how the guava leaf and some dried flowers served as such good embellishments!


The most unusual of objects, sometimes even aging leaves that fell off the tree, can be thrown in to give a dramatic effect for your creative output! There is of course that glittery ribbon to top the pointed ends, but I guess the gift wrap would have looked good even without it.

Now for more! What you see in the picture below is actually brown paper (yeah, it is neither white nor off-white) and a saree border to give it the feel of a folded saree, leaves from the garden taped to the brown sheet.

It has been used to wrap a book gift.


Lalitha used some more border, for a bookmark to accompany the book gift. I love this, because I believe every book deserves a bookmark.

Check out: http://imprintshandmade.blogspot.com/2012/03/saree-border-bookmarks.html
Here, she stuck the piece of saree border on to a cardboard, and used the purple satin to give it a base. On it's upper end, she has punched a hole to string the ribbon piece through for a bow.

Look out for more - there is a part three to this post too! Thank you Lalitha, for your creativity that does not stop!

Pictures courtesy: Lalitha Menon

If you wish to use the pictures and content here, credit to Lalitha's pictures and Imprints Handmade's content is a must